


Author: Ashish
Why Are Security Cameras at Risk of Hacking?
You install security cameras to secure your premises. With security cameras, you get a third eye to keep a check on your property from anywhere you want. You don’t have to be physically present to know what happened and who was behind it. You can remotely check the videos and decide on the next step. But, the thing is that security cameras need security for themselves to secure your premises.
Did you understand the last statement? We will explain again but in a different way.
Security cameras are at risk of hacking. Yes, you read it right. Hackers find loopholes and are ready to hack security cameras for their benefit. They get a lot of information by hacking your security cameras.
How are security cameras at risk?
Hackers don’t hack security cameras. They find different ways to do that. And unfortunately, you give this option to the hackers and suffer the consequences.
To view the activities at your property from remote locations, you connect your security cameras to various devices like mobiles, PC, or laptops through the internet. Through this connection, you check the live as well as recorded footage of the security cameras. This is where the hackers attack indirectly.
Hackers reach the security cameras through the software you use on the connected devices. They check details and manipulate things in their favor. Sometimes, they divert the recording to their devices without you knowing about this. In other words, two or more people access the recordings of the security cameras.
Other than this, you allow hackers to hack your security cameras by using unlicensed pieces of equipment. You don’t follow the rules and regulations to install security cameras. Most importantly, you don’t use security software to protect your systems and cameras. Because of this easy and convenient access, the hackers guess the passwords and attack.
What should you do to prevent the hacking of your security cameras?
Buy cameras from a trusted source
We already said that poor equipment makes hacking easier for hackers. As security cameras are the primary device, you should buy them from a trusted source. It’s said that the efficiency of the cameras increases when they are manufactured by a reputable brand and bought from a trustworthy supplier.
Along with security cameras, other hardware components should be of high quality as cheap quality will make them vulnerable to hackers. Also, you should take care of the software design of the security cameras. The software design should be of high quality to prevent widespread vulnerabilities.
Opt for 2-factor authentication
Hacking becomes easier for hackers when they guess the passwords and find that there are roadblocks ahead. They just have to enter the password to access the software and get the important details.
To prevent unwanted access to computer and network devices, you should have unique and strong passwords for all the devices connected through the internet. We know it’s difficult because strong passwords are not easy to remember. And you very well know that using the wrong passwords several times can block your access.
You can get rid of this memory problem by using a reputable software-based password manager. This application keeps passwords secure and prevents them from being forgotten or lost. But still, you should change the passwords every three months to increase the security of your device and data.
Regarding the 2-factor authentication system, it’s the second line of defense that requires a separate device to allow login into the account. Whether you are logging into your connected devices or software to check the videos, the authentication link or code will go to another system as well. The login will happen only if the person receiving the link or code confirms. This is done to authenticate the identity of the user.
As an account gets logged in two steps, it’s known as a 2-factor authentication system. This system adds an extra layer of protection.
Use a secured Wi-Fi access
Whether it’s your home or office, you should use a secured Wi-Fi network to connect the security cameras. If the Wi-Fi network is secure, you will avoid the risk of being hacked.
For secured Wi-Fi access, you should get a connection from a reliable service provider. You should avoid local connections and opt for brand connections. Make sure the Wi-Fi connection you choose is used by others as well. You shouldn’t be a single user of that particular network provider.
Other than this, you should have quality Wi-Fi routers and internet modems and update them regularly. No matter what, you shouldn’t use old and outdated devices for Wi-Fi networks as they are vulnerable to hacking.
Check firmware and software updates
The firmware and software used by you to run the security cameras and check the videos captured by them should be updated. Though it’s the responsibility of the security camera vendor, you should keep your eyes on them as well.
In every situation, you should use the latest released firmware and software on your systems and for your security cameras. Also, you should update them regularly as it’s not a one-time process. Updating will prevent hackers from using critical vulnerabilities.
If you are looking for security camera installation in Dubai, come to Gear Net Technologies. We offer advanced technology security camera installation along with quality products to keep your security system within your premises safe and protected from vulnerabilities. To know more, please connect with us via WhatsApp at +971585811786
Why are the wires within an Ethernet cable twisted?
“Why is Ethernet wire twisted inside?” is a subject that IT professionals and cabling experts are frequently asked. This riddle is around the operation of Ethernet cable and why it is referred to as balanced twisted pair. Let us unravel this riddle and discover the truth!
How do the twisted wires work?
The twists’ principal function is to reduce internal electrical interference. In effect, Ethernet cable has its own “shielding” built in. You may believe that unshielded Ethernet cable has no shielding and that protected Ethernet cable has shielding. This is just partly true. While shielded Ethernet cable, such as F/UTP has an overall foil shield, the cable cannot function without the “built-in” shielding of twisted pairs.
The purpose of the external, general foil shield is to keep outside electricity (magnetic fields or radio waves) from getting into your cable.
Every wire conductor produces an uneven electromagnetic field. As a result, one conductor may interfere with another. Given that gigabit Ethernet uses all eight conductors, this would be a terrible disaster if all the conductors began “talking” to each other. Cross-talk occurs when electrons are passed back and forth between conductors.
There will be a magnetic field encompassing every extension cable or anything that passes electrons through it to some degree. The magnetic field becomes smaller as the voltage decreases. The voltage in the Ethernet cable is relatively low, but it is still present, and the twists in the conductor pairs protect the cable from itself.
Each twist reverses the polarity of the conductors, canceling out disparities in their unique electromagnetic fields. As a result, electromagnetic equilibrium is achieved, which is why Ethernet cable is referred to as balanced twisted pair. We have achieved harmony. The couple is “quieter,” similar to a library. We can now converse with each other and genuinely understand each other.
What are the Reasons for Twisted Wires?
The Reduction of Noise
No engineer would tamper with equipment unless there was a benefit to doing so. The colorful wires are not twisted to make the conductor look odd; they are twisted to reduce unwanted noise signals.
Previously, telephone wires were not as elaborately or widely twisted as they are now. The pair of wires carrying or receiving telephonic signals would be twisted or their places on each pole would be switched. These poles were spaced at equal intervals and piled for several kilometers. The pole, now a relic from a brilliant era of scientific discoveries and advancements that saw the birth of what is now called “premodern” or even “modern” technology, can still be seen in rural areas.
The impulses sent over the two cables were of similar magnitude but polarity. As a result, if one wire carries a voltage +A signal, the wire parallel to it will carry a voltage -A signal. These are known as differential signals because the output of a receiver when they are received is the arithmetic difference of these signals. To generate 2A, the receiver subtracts A and -A. But why is this so clever?
Only in an ideal world would the receiver receive both signals A and -A without any noise. The environment will inevitably introduce noise into the cables, causing the signals to be corrupted. Noise signals, on the other hand, are injected without any polarity reversal: the source of noise induces a voltage component in both lines, say, +N, rather than +N and -N. As a result, the distorted signals received by the receiver are (A+N) and (N-A). However, because it subtracts both inputs, the resulting output is completely noise-free, as (A+N) – (N-A) = 2A.
However, it is based on a fallacy. It is based on the assumption that the amplitude of the noise created in the two parallel lines is equal. This is undoubtedly false, because the source may not be equidistant from the two cables. As a result, one wire would be subjected to more noise than the other.
One solution is to expose the other wire to additional noise, so making the two components equal. The magnitude of noise created in the two wires would be the same if they were regularly exposed to the source of noise turn after turn. This may be accomplished by twisting or swapping the wires!
Electromagnetic Interference (EMI)
Wires are no longer thick and taut between tall poles; instead, they are incredibly thin and commonly found taut or spreading between small, weirdly shaped boxes a century later. And, yeah, boxes and wires are connecting them all over the place.
The issue presented by so many closely spaced wires is that noise in a wire is now created not only by the environment but also by other wires in its vicinity. Electrons in motion, like those that make up a current in a conductor, emit electromagnetic waves. Electrons in the wire next to it can be disturbed by electromagnetic waves produced by one wire. Because EM waves are made up of oscillating or changing magnetic fields, an EM wave passing through a wire can generate a current in it. This is known as cross-talk, and the noise is known as electromagnetic interference (EMI).
Extensive braiding eliminates noise in two ways: first, as previously stated, equal exposure to the source ensures that most of the noise is canceled when the signals are subtracted by the receiver; and second, at each twist, the magnetic field produced by the wire changes its polarity, such that the currents induced are opposite in polarity, which eventually negate each other to produce effectively noise-free signals. Effectively, but not entirely!
Connect with us via WhatsApp at +971585811786 to buy top-notch Ethernet cables at affordable prices!
What is the Purpose of Fiber Optic Cable?
The fight between fiber optical and copper cables has always been intense. But, in the current scenario, things are a bit sorted as most people have inclined to fiber optic cables. You will find only a small number of people using copper cables. And the main reason for this is that they are not much aware of the fiber optic cables.
In this post, we will discuss the purpose of fiber optic cable along with its other important details and specifications.
Fiber optic cable is based on fiber optics, a technology that transmits information as light pulses along a glass or plastic fiber. It contains a varying number of glass fibers, ranging from a few to a couple hundred. There is another glass layer called cladding, surrounding the glass fiber core. The cladding is protected by a buffer tube layer and a jacket layer acts as the final protective layer. The final or protective layer is for the individual strand.
How does fiber optic cable work?
The data is transmitted in the form of light particles or photons from fiber optics pulses through a fiber optic cable. Every glass fiber and cladding in the cable bends the incoming light at a certain angle as they have a different refractive index.
Light signals sent through the fiber optic cable reflect off the core and cladding in a series of zig-zag bounces. This process is called total internal reflection. As the glass layers are denser, the light signals don’t travel at the speed of light. The traveling speed of the light signals is about 30% slower than the speed of light.
The fiber optic cable supports up to 10Gbps signals. The thing is that the cost of cable increases if its bandwidth increases.
Is there a way to boost the signal journey?
Yes, there is a way to boost the signal throughout its journey using repeaters at distant intervals. Used for fiber optics transmission, the repeaters regenerate the optical signal by converting it to an electrical signal. Then, the repeaters process the electrical signal and retransmit the optical signal.
What are the types of fiber optic cables?
Single-mode fiber
Due to the smaller diameter of the glass fiber core, the single-mode fiber is used for longer distances. It’s because a smaller diameter lessens the possibility of attenuation. The attenuation is defined as a reduction in signal strength.
The single-mode fiber has a smaller opening as well. This opening isolates the light into a single beam, which offers a more direct route and enables the signal to travel a longer distance.
Other than this, the single-mode fiber has considerably higher bandwidth, so it’s expensive. Another reason for its high cost is that it requires precise calculations to produce the laser light in a smaller opening. And the laser is the light source used for single-mode fiber.
Multimode fiber
Due to the larger core opening, the multimode fiber is used for shorter distances. The core opening of the multimode fiber enables light signals to bounce and reflect more along the way. Also, the diameter is large, which permits multiple light pulses to be sent through the cable at one time. This results in more data transmission.
Unlike single-mode fiber, the multimode fiber uses a LED to create the light pulse. People don’t consider multimode fiber cable because there is more possibility for signal loss, reduction, and interference.
What’s the purpose of fiber optic cables?
The advantages of fiber optic cables of supporting higher bandwidth capacities, further light traveling without needing as much of a signal boost, being less susceptible to interference, being submerged in water, being stronger, thinner, and lighter than copper cables, and not requiring frequent maintenance or replacement make them highly purposeful. The cables can be used for different reasons and in different industries.
Computer networking and broadcasting
The fiber optic cable’s ability to transmit data and provide high bandwidth makes it an important element in computer networking. This is a very common use case of cable. For the same reasons, cable is frequently used in broadcasting and electronics, providing better connections and performance.
Internet and cable television
Both internet and cable television require long-distance connections. Sometimes, the connection requirement is between two computer networks in different locations. To establish this connection seamlessly, the fiber optic cable is used. No other cables can provide such strong data transmission over a long distance.
Undersea environments
As already mentioned, the advantage of fiber optic cable is that it can be submerged in water. Based on this, the cable can be used in undersea environments and other at-risk situations. The best thing is that fiber optic cable doesn’t require frequent replacement even if it is submerged in water.
Military and space
Other than the communication and signal transfer, the fiber optic cable provides temperature sensing. This is what makes the cable suitable for military and space industries. Other reasons that make fiber optic cable suitable for military and space industries is its lightweight and small size.
Medical
In the medical industry, fiber optic cable is used in a variety of medical instruments to provide precise illumination. As the cable enables biomedical sensors, it helps in minimally invasive medical procedures. Other than this, you will find the use of cable in various tests like MRI scans because it is not subject to electromagnetic interference.
The purpose of a fiber optic cable is very strong. It simplifies the work in different industries. So, choose it over a copper cable.
To know more about a fiber optic cable, please connect with us via WhatsApp at +971585811786
Which is the finest camera for home security?
Most of us want to be able to go about our daily business without having to worry about security issues, such as home invasions and burglaries.
Even if your neighborhood seems safe, you don’t want to get caught off guard and unprepared if there’s ever an emergency that requires you to have home security cameras in place.
But what is the best home CCTV camera system on the market today? How do they differ from one another? Are you ready to learn the answers to these questions and more? Read on!
Dahua IP Cameras
Dahua is a leading supplier of IP cameras and offers many different camera models with features like 4K resolution, night vision, motion detection, pan and tilt capability, as well as local storage.
Dahua has been in business for over several years and is known for providing high-quality video cameras such as Dahua PTZ, Dahua Composite Video Interface at affordable prices. The best part is it comes in a wide range of mega pixels starting from 1 MP to 12 MP.
Uniview IP cameras
Uniview is one of the best security camera companies on the market, and their IP cameras are a great choice for keeping your home safe. The cameras can be set up using Wi-Fi, Ethernet or 3G/4G connections, and they also have a built-in DVR. Their night vision has a high IR range and they’re equipped with two-way audio that transmits over two separate channels.
Nest Cam
The Nest Cam is a great choice for home security because it is easy to use and comes with a number of features that set it apart from other cameras. First, this camera has an excellent field of view, so you can see what’s happening in your entire home.
Second, it has the ability to zoom in up to 8x magnification. Third, the Nest Cam offers a two-way talk feature which allows you to chat with family members or pets as if they were there with you. Fourth, you can stream live footage from the camera on mobile devices including iOS and Android smartphones and tablets.
Blink Outdoor
Blink is an outdoor camera that is perfect for those with a minimalistic design style. This small, circular camera can be mounted on your house or garage and syncs wirelessly with your home’s Wi-Fi.
It also has a two-way microphone so you can speak through the camera. With your Wi-Fi network connected, the camera communicates wirelessly with a small base station, running on two AA batteries (should last up to two years).
Hikvision Turbo HD cameras
Hikvision’s Turbo HD cameras are a high-quality choice for anyone looking for a home security camera. They offer full 1080P high-definition video recording and allow you to view live footage on the camera or remotely via the Internet.
It is activated when a target is detected in order to deter intruders while simultaneously capturing colorful images with vital information. Finally, these cameras are great because they’re extremely easy to install and use right out of the box.
Wyze Cam v3
Wyze Cam is a budget-friendly and easy to use home security camera. The Wyze Cam v3 records high quality video with a 1080p resolution, night vision, two-way audio and motion detection.
It also comes with an optional magnetic base for indoor or outdoor placement. It has a 110 degree viewing angle which means it will cover a huge area. The best part is its high quality color night vision.
How to Choose the Best Home Security Camera
There are plenty of different home monitoring cameras available on the market, so deciding which one to buy can feel like quite the overwhelming task. Here are a few tips that you can use to narrow down your search and choose the best home security camera for you!
Consider the field of view
Field of view is a measure of how much you can see at any given time. This is usually measured in degrees and also refers to the width of what you can see (horizontal) versus how far away it is from your point of view.
For example, if you are looking at an object that is 10 feet away and has a 90-degree field of view, then it would be able to capture everything within 9 feet on either side.
Look for night vision
Look for a camera that has night vision. Night vision allows you to see up to 25 feet in complete darkness. This is especially helpful if you live in an area with lots of street lights at night, because it will help you see where someone is coming from so they can’t sneak up on you.
Compare wired and wireless options
Wired security cameras are a popular choice because they’re less expensive and offer a higher level of reliability. However, wireless systems are easier to install and give you greater flexibility in where you place your cameras.
Depending on your needs, either wired or wireless could be the best choice. Wired is typically cheaper and more reliable, but wireless systems can provide more flexibility in camera placement.
Conclusion
With so many options on the market today, it’s difficult to know which is the best option for you. It’s important to do your research and pick the camera that’s right for you. Although each of these home monitoring cameras has its own special features, it ultimately comes down to what your needs are, what you’re looking for in a camera, and how much you want to spend. To get the best home security cameras, please get in touch with us via WhatsApp at +971585811786.
What is a Cat6 Ethernet Cable?
Discussion on Ethernet Cable is incomplete without mentioning Cat6. Undoubtedly, it’s a basic requirement for new installations to support Gigabit network applications and support bandwidths of up to 250MHz.
Years ago, Cat6 was not used by installers because of cost. It was said that Cat6 Ethernet cables are the most expensive option for installers. But, today, the cost of the cable has been reduced substantially. It’s wholeheartedly accepted in the industry, offering several benefits.
In this post, we will discuss the Cat6 Ethernet cable in a bit more detail.
Cat6 Ethernet cable is the sixth generation of twisted pair Ethernet cabling, consisting of four twisted pairs. The cable is terminated by an RJ45 or on a path or a keystone jack. The maximum speed of the Cat6 Ethernet cable is 10Gbps.
How is Cat6 Ethernet cable used?
As a cost-effective option, the Cat6 is widely used for smart home installations, enterprise networks, and electronic labs. The performance of the cable is more stringent, enabling higher speeds and more robust data transfer.
Administrators use Cat6 Ethernet cables at the network’s backbone in conjunction with fiber optic. The potential for better speeds and less crosstalk of Cat6 dominate new enterprise and home networks.
As Cat6 is more reliable at longer distances, it’s a good fit for the wave of 60W and 90W Power over Ethernet technologies. Surprisingly, these technologies are currently on the market.
What are the different types of Cat6 Ethernet cables?
The Cat6 Ethernet cable is classified into different types based on different specifications:
- Shielding type- Shielded and unshielded Cat6
- Copper conductor- Solid and stranded Cat6
- Cable jacket rating- CM, CMR, and CMP Cat6
Shielded and unshielded Cat6 Ethernet Cables
Also known as UTP Cat6, the unshielded cable comes with twisted wires that are twisted together to reduce noise and crosstalk. On the other hand, the shielded Cat6 is a twisted pair cable that is confined in a foil mesh shield, guarding the cable against electromagnetic interference (EMI).
The shielded Cat6 Ethernet cable is used for high-speed networks such as data centers. In these data centers, 10GBase-T networks are used. In simple words, the shielded Cat6 Ethernet cable is used in areas with high interference and running cables outdoors or inside walls, whereas the unshielded Cat6 is used between your computer and the wall.
Solid and stranded Cat6 Ethernet Cables
A single piece of copper is used in solid cable for the electrical conductor. It isn’t very flexible but durable. Due to durability, the solid cable is ideal for permanent installations as well as outdoor and indoor walls.
On the other hand, the stranded cable uses a series of copper cables twisted together and is very flexible. It can be used at your desk or anywhere you move the cable around often. It’s said that stranded cable has high attenuation. So, you should keep the cable short to lower the chance of introducing even more attenuation into the system. The better lengths for stranded cables are under 6 meters.
Commonly, the stranded cable is used for connecting workstation network interface cards (NICs) and outlets or between concentrators and patch panels, hubs, and other rack-mounted equipment.
CM, CMR, and CMP Cat6 Ethernet cables
Cat6 CM cable generally has minimum jacket ratings of Ethernet cables, making them appropriate for installation inside a residence or a single-story commercial building. Cat6 CMR cable is referred to as “Riser-rated Cable”. The design of the cable is such that it prevents fires from spreading between floors through risers or vertical shafts.
Cat6 CMP cable is very different from CM and CMP cables. It is referred to as “Plenum-rated Cable”. The jacket material of the CMP cable retards the spread of flames and does not give off much smoke or toxic gas when burned. So, it is ideal for plenum spaces where the building’s air ducts are connected for heating, ventilation, and air conditioning. For example, you will find Cat6 CMP cable in raised floors and drop ceilings.
What’s the difference between Cat6 and Cat5e?
Cat6 replaced Cat5e. People use Cat5e over Cat6 Ethernet cable only because of the cost.
The Cat6 Ethernet cable supports speeds up to 10 gigabits at shorter distances of 165 feet or less, meeting modern expectations for massive data transfer applications in deployments.
Compared to Cat5e, the Cat6 Ethernet cable offers more tightly wound wire pairs. The pairs are typically a spline, thicker copper conductors, and a thicker cable jacket than Cat5e. Because of these features, the Cat6 has better resistance to interior cable noise, which is also known as crosstalk. Other than this, the Cat6’s thicker sheath protects cable to cable (alien) crosstalk (AXT).
How compatible is Cat6 with Cat5e Ethernet cable?
Both Cat6 and Cat5e utilize the same end piece, meaning they can be plugged into the same ports. The difference is in their capabilities, as well as the methods and materials used to manufacture them. You can plug both Ethernet cables into any Ethernet jack on a computer, router, PoE switch, or other devices.
What’s the maximum supported bandwidth of Cat6 at a given distance?
When deploying NBASE-T switching technologies, the Cat6 Ethernet cable runs up to 5Gbps standard for up to 100 meters. For shorter distance runs, the Cat6 supports up to 10 gigabits up to 165 feet. It is desirable in environments where large data transfer is required such as hospitals, school districts, and data centers.
This is a standard consideration. Just keep in mind that each installation is different and performance should be certified by qualified professionals along with the documented results.
This is what the Cat6 Ethernet cable is. To know more, please connect with us via WhatsApp at +971585811786.
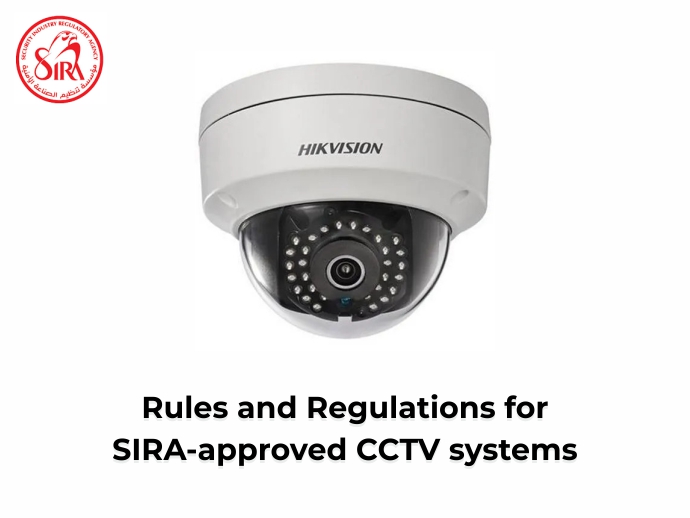
Rules and Regulations for SIRA-approved CCTV systems
Established in 2016 by a decree from HH Sheikh Mohammed Bin Rashid AL Maktoum, Vice President and Prime Minister of the United Arab Emirates and Ruler of Dubai, the Security Industry Regulatory Agency or SIRA aims to provide high-end security by implementing standard security devices and services. The agency was established because the Dubai government always gives prime priority to the safety and security of the people in the state.
The role of the SIRA is to protect lives and welfare by implementing highly secured systems, suggesting new rules, training the new security team, and inspecting the new facilities. Its certification is important to operate in Dubai for security companies, personnel, and products.
What’s the reason to apply for SIRA certification for CCTV systems?
To ensure that CCTV installation in your building or facility is in good condition, you need SIRA certification. The CCTV systems in your establishment should be installed as per the guidelines and up-to-date with the latest technologies specified by SIRA. This is mandatory if you are in Dubai.
If the CCTV systems are improperly installed, fines are imposed on the facility owner. Just keep in mind that different guidelines for CCTV installation are specified by SIRA for various types of buildings and institutions.
Other than this, SIRA NOC is required for issuing a building completion certificate.
What are the SIRA rules and regulations for CCTV systems?
As SIRA certification is important for security and avoiding penalties, you should know and understand its rules and regulations. Make sure they are strictly followed when CCTV systems are installed on your premises so that SIRA doesn’t reject your application for the certificate.
The rules and regulations vary with the camera types.
For VSS Cameras
The cameras should be colored and manufactured to provide security for an extended period without interruption. Other than this, the cameras must be IP66 rating and placed in a protective container.
If you are installing VSS cameras 4 meters and above, make sure they have the remote Zoom and focus ability. Also, you should use Auto Iris on the sites where the lighting varies according to the time. Last, you should use cameras fitted with audio microphone recording only if permitted by SIRA.
Analog Cameras
The cameras should be colored and the resolution should not be less than Full HD 1080p on the analogous system. Make sure the color scheme is compatible with the Phase Alternating Line or PAl. This is a color scheme adopted in the UAE.
Other than this, the signal-to-noise ratio of the analog cameras should not be less than 48 dB.
Digital Cameras
The cameras should be colored and the resolution should not be less than Full HD 1080p. In digital cameras, the bit rate plays an important role. Here, the variable bit rate should be activated and the fixed bit rate must not be used or activated, without maximum speed limits.
Other than this, the digital cameras should be compatible with all standard security systems management software operating in the market or capable of linking directly with well-known standard systems. Also, the signal-to-noise ratio of the cameras should not be less than 48 dB.
How should you get SIRA approval for CCTV systems installed in your facility?
The approval process for CCTV systems is easy because SIRA manages it through its online portal. If you search online, you will find the right portal for registration and approval processing. The Security Service Providers or SSPs have access to this portal. So, as a Security Service User or SSU, you should create a Facility Account on the portal.
The thing is everything will be handled by the SSP but you will get the updates as well. Your SSP will upload all the details of your CCTV system on the SIRA portal. The details include camera model numbers, IP addresses, and camera-to-recorder mapping. Other than this, the SSP uploads a schematic diagram and creates a maintenance agreement on the portal.
After the installation of the CCTV camera and completion of the associated documentation, the SSP will request a SIRA audit. On request, the SIRA will assign an auditor to check your CCTV system. The time to visit your site for an audit will be discussed with the SSP by the auditor.
Based on the rules and regulations for SIRA-approved CCTV systems discussed above, the auditor will audit your system. If your CCTV installation doesn’t meet SIRA’s requirements, the auditor will issue a FAIL report. And if everything is fine and according to the SIRA’s requirements, the auditor will give a PASS report. Along with the FAIL report, the auditor will give a list, mentioning the things that need to be rectified to pass the inspection.
If the report is FAIL, your SSP will rectify the mistakes and re-apply for inspection. The auditor will come again for an inspection. If your CCTV installation meets all requirements, the auditor will give a PASS report. If the audit fails again, your SSP will be issued a FAIL report again. The cycle will continue till the report says PASS and the auditor upload the report on the portal. After uploading a PASS report, the SSP will apply for and obtain the NOC.
SIRA performs a remote log-in as well to check the connection and to see if it can access all cameras. Based on this, SIRA issues a connectivity certificate. This certificate is important to pass the SIRA inspection.
Following rules and regulations for SIRA-approved CCTV systems are essential. So, we recommend working with Gear Net Technologies LLC, one of the best SIRA-approved CCTV companies in Dubai.
To know more, please connect with us via WhatsApp at +971585811786.
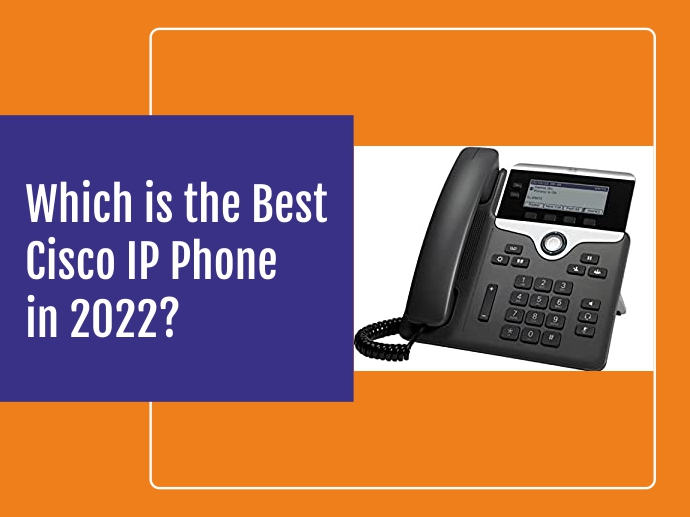
Which is the Best Cisco IP Phone in 2022?
Undoubtedly, Cisco IP phones are ruling the industry. With every model introduced by Cisco, the competition stiffens because competitors are a bit insecure. They try to compete but often fail severely. So, there is nothing wrong if we say that all the models of Cisco IP phones are the best. It’s said that Cisco IP Phones models are for every business, niche, and budget. No matter what you pick, the result will be great.
Why are Cisco IP Phones popular?
Cisco set the industry standard, meaning other brands follow it to manufacture IP phones and other networking components. Cisco drives innovation in areas such as Artificial Intelligence with their AI-powered Spark Assistant. The brand also brings decades of research and experience to all of its products.
As Cisco stays on the cutting edge of technology while keeping the user experience in mind, its IP phones are of the highest quality and most popular in the market.
Best Cisco IP Phones in 2022
We already mentioned that every model of Cisco IP phones is the best. But, people are confused while choosing an option for their business. They don’t know which IP phone model will fit their business requirements and lead to seamless operations.
When choosing a Cisco IP phone, you should consider a few important points.
- Look for high-quality sound, whether you are using Bluetooth, a handset, a speakerphone, or even video chat. If the voice is not clear, the purpose of the Cisco IP phone will not be fulfilled.
- Look for high-quality features such as programmable keys, a Gigabit switch, and key expansion.
- Look and determine if the phone will last with wear and tear as well as personnel changes and rapid business growth in the years to come.
- Make sure the IP phones are easy to use for everyone.
Cisco CP-8861
As part of the Cisco 8800 series, the features of Cisco CP-8861 phones are:
- 5 lines
- Wi-Fi support
- Integrated Bluetooth
- A USB port with fast charging capability
- Wideband audio and Echo cancellation for voice clarity
- 10/100/1000 internet switch for exceptional speed
This model is user-friendly because of its sleek and ergonomic design. The high-resolution color allows easy and quick scrolling through a directory or voicemail list. The part of Cisco CP-8861 is its powerful technology and design. One of the cutting-edge features of the phone is Cisco’s Intelligent Proximity for Mobile Voice. This feature activates when users bring mobile devices close to any voice and/or collaboration endpoints in the system.
Cisco 8845 IP Phone
The features of the Cisco 8845 IP phone are:
- High-quality HD video phone
- Cutting-edge unified communication
- High level of security
- Cisco’s Intelligent Proximity for Mobile Voice
- Attractive, ergonomic, and intuitive design
- Wideband audio and full-duplex speakerphones
The sound quality and video quality of the Cisco 8845 IP phone are top-notch, where the video is 720p HD with H.264 advanced video coding. Even the voice quality of this IP phone is crystal clear. The phone allows users to easily communicate across multiple channels and take advantage of hundreds of advanced Cisco features with ease.
Cisco CP-8865 IP Phone
As the successor to the 9951/9971, the features of the Cisco CP-8865 IP phone are:
- High-definition Video conferencing
- Wi-Fi with the capability to ass KEM accessories or any other hard-wired connection
- 10/100/1000 integrated internet switch
- 5-inch widescreen VGA with 24-bit color
The Cisco-8865 IP phone is a great option for open workspaces, large conference rooms, executive offices, and active mobile users within a campus. It has more modular compatibility than Cisco 8845 IP phones. It’s best for executive staff and advanced IT/AV workers. The phone offers superior value today and tomorrow
Cisco CP-7841 IP phone
Considered a sibling of the 7861, the Cisco CP-7841 IP phone has the following features:
- High-end Ethernet switch (10/100/1000)
- High-resolution 384×106 pixel display
- A built-in speakerphone
- Wideband audio
In the Cisco CP-7841 IP phone, there is no dedicated line panel but it manages up to four lines simultaneously without mixing out the interface. You will find a pleasant white backlight in the model for its anti-glare graphical model chrome display. The advanced Cisco connectivity features of the phone include multi-call, per-line graphics, and mobile remote access. There is an auxiliary port as well.
Cisco 7861 IP Phone
The Cisco 7861 IP phone includes the following features:
- Replaceable bezel option for greater choice and flexibility
- Power over Ethernet (PoE) Class 1
- Cisco EnergyWise
- High-resolution display
In this IP phone, you will find a combination of modern features, security, and audio clarity with state-of-the-art tech enhancing the speakerphone experience. Though the phone lacks some flashier accessories and features such as color screens and ultra compatibility/ connectivity, it is a great option for large as well as small businesses, making straightforward task-oriented convenience.
Other than this, you will find a standard anti-glare monochrome screen with a pleasant white backlight and a straightforward user interface. There are advanced menu features such as a phonebook and call log access. Also, the security of the device is up to date and it offers cloud delivery, helping businesses that expect to scale. The only thing is this phone lacks a 10/100/1000 integral switch.
Check and compare the features of Cisco IP phones but only based on your business requirements. Sometimes, the features of the phones are impressive but they don’t fit all business circumstances. So, choose wisely.
To know more about Cisco IP Phones, please connect with us via WhatsApp at +971585811786.
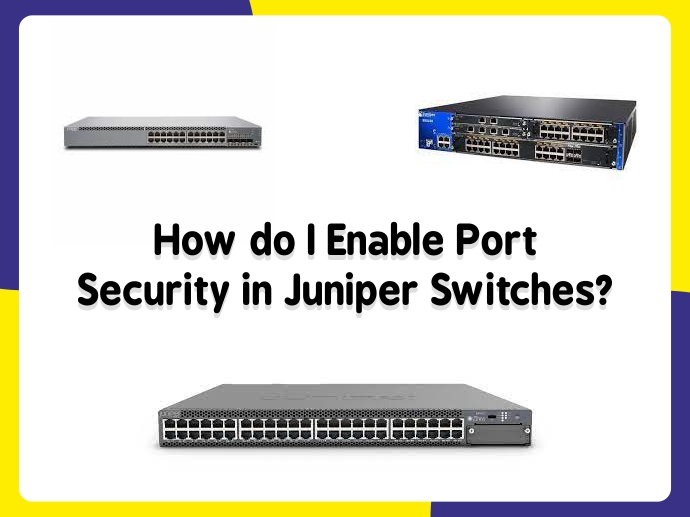
How do I enable port security in Juniper Switches?
Ethernet LANs need to be protected because they are susceptible to address spoofing and Layer 2 DoS attacks. Fortunately, the port security feature allows you to protect the access ports on your device against such attacks.
Juno OS is robust because of the separation of control forwarding and services planes as each function runs in protected memory. On the other hand, the control-plane CPU is safeguarded by rate-limiting, routing policy, and firewall filters. This helps ensure server uptime even when there is a severe attack.
Is It Easy to Add Port Security Features in Juniper Devices?
Yes. The specialized Juniper operating system Juno OS comes with several features for port security on your device. You can categorize your ports as trusted and untrusted and then can apply appropriate policies to each category to ensure port protection against various attacks.
All the basic port security features are enabled by default in the device’s configuration. You can use a single Juno OS CLI command to control access port security features such as dynamic address resolution protocol (ARP) inspection, DHCP snooping, and MAC limiting. In short, you can configure additional port security features with minimal configuration steps.
Based on the feature you want to enable, you can configure it either on VLANs or bridge domain interfaces.
What hardware and software security features do Juniper Switches offer?
Some of the hardware and software security features that come with Juniper Networks EX Series Ethernet Switches are:
- Console port
- Out-of-band management
- Software images
- User authentication, authorization, and Accounting
What port security features do Juniper Switches have?
Some of the port security features available with Juniper Networks EX Series Ethernet Switches are:
- DHCP Snooping
- Trusted DHCP Server
- DHCPv6 Snooping and other options
- Dynamic ARP Inspection (DAI)
- IPv6 Neighbor Discovery Inspection
- IP & IPv6 Source Guard
- MAC limiting & MAC move limiting
- Persistent MAC Learning
- Unrestricted & restricted proxy ARP
What kind of protection does Juniper switch port security provide?
Port security features can protect the Juniper Switches against the following attacks:
- Ethernet Switching Table Overflow Attacks – An attacker sends so many requests from new MAC addresses that the table can’t accommodate or learn all addresses.
- Rogue DHCP Server Attacks – An attacker sets up a rogue DHCP server to imitate a legitimate DHCP server on the LAN and issues leases to the network’s DHCP clients to disrupt network access, leading to DoS.
- ARP Spoofing Attacks – An attacker sends fake ARP messages on the network and associates its own MAC address with the IP address of a network device connected to the switch and then the traffic that is intended for that IP address is sent to the attacker.
- DHCP Snooping Database Alteration Attacks – an attacker introduces a DHCP client on one of the switch’s untrusted access interfaces with a MAC address similar to that of the client and acquires the DHCP lease, which ultimately results in changes into the entries in the DHCP snooping table.
- DHCP Starvation Attacks – An attacker floods the Ethernet LAN with DHCP requests from counterfeit MAC addresses so that the switch cannot keep up with requests from legitimate DHCP clients on the switch.
How do I enable port security in Juniper Switches?
Here is how to configure Layer 2 Port Security Features on Ethernet-Connected End Systems:
To Configure Storm Control
- Create a storm control profile and specify the % of the bandwidth available to BUM traffic
- Apply the storm control profile to ingress Layer 2 interface. When the profile is applied to the interface, the interface stays in the default switch interface.
- Verify storm control activity, you can filter system log messages related to storm control
To Configure Port Security Using MAC Filtering
- Set up a firewall filter for the ingress interface
- Apply this filter to the ingress of an access interface /Layer 2 surface.
- Set up a firewall filter for the egress interface and apply this filter to the egress interface.
- Verify Mac filtering on both ingress and egress interfaces
The above is a brief view of what needs to be done to enable port security. For detailed commands, you can check this link.
For any queries related to the purchase of Juniper switches and Juniper security modules and cards, please connect with us via WhatsApp at +971585811786.
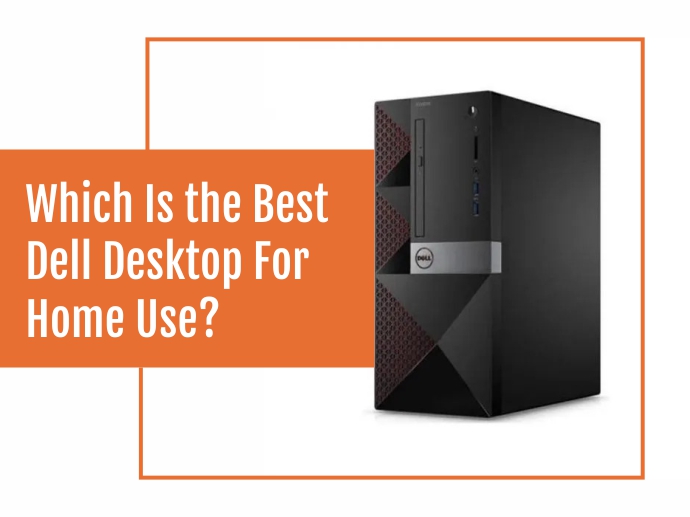
Which Is the Best Dell Desktop For Home Use?
For home use, desktop computers are better than laptops. Here, you don’t need portability but functionality to handle both small and large-scale jobs. Sometimes, they are also used to handle office jobs.
Compared to laptops, desktop computers offer raw power and performance. They don’t have the size, thermal, and power consumption constraints of laptops. As desktop computers use electric power and are not battery-operated, they are better used for high-intensity work like 4K video editing or resource-intensive tasks like gaming. If you do these things on laptops, they will take longer and burn battery life really quickly.
If you are looking for a desktop computer for home use, Dell is one of the best brands. It has brought many models to the market with lots of advanced features. You just need to know your requirements, check the features based on that, and choose one.
In this post, we will discuss some popular Dell desktop computers for home use.
Dell OptiPlex 7080 Micro Desktop
Available with Windows 11 or Windows 10 operating system, the Dell OptiPlex 7080 Micro Desktop delivers immersive productivity and performance. It’s said to be a premium, intelligent micro form-factor desktop.
The desktop comes with an AI-powered Dell optimizer Express Response. This optimizes the performance of the top applications. The performance of the desktop is uncompromising as it’s built with 10th Generation Intel up to 10 Core i9 processors, up to 64GB 2933Mhz DDR4 RAM, and up to 65W CPU support. Other than this, there is discrete graphics support from AMD, giving a better experience for 4K monitor use and 3D rendering. The Intel Optane or dual M.2 SSD options provides high-speed data access.
Dell Inspiron 3471 Small Desktop
Available with Windows 11 or Windows 10, the Dell Inspiron 3471 Small Desktop provides exceptional performance with endless possibilities. The latest Intel processors in the desktop define the newly redesigned Inspiron desktop.
The Dell Inspiron 3471 Small desktop offers deserving performance with its high-capacity hard drive, the latest Intel processors, and improved system cooling. It is built with up to 9th Gen Intel Core processors up to Core i5, giving fast, reliable performance. The hard drive storage is 1TB, where you can also choose dual drives or add on an optical drive for plenty of backup space. The efficient DDR4 SDRAM ensures faster load times, higher transfer rates, and less power consumption. With this desktop computer, multitasking is possible, where you can enjoy high-quality visuals, presentations as well as video edits.
Dell Precision 7920 Tower Desktop
Available with Windows 11, Windows 10, or Ubuntu, the Dell Precision 7920 Tower Desktop comes with a versatile design and ultimate storage scalability. It features the latest Intel Xeon vPro processor, which is scalable up to 28 cores per processor or a total of 56 cores when customized with Dual processors.
The processors offer performance, manageability, built-in security features as well as stability, aligning with a future-proof option. There is room for everything with Dell Precision 7920 Tower Desktop because it comes with up to 3TB of 2666 MHz RDIMM/LRDIMM expandable memory, which requires dual processors. Even if used for long hours, the desktop stays cool as it features a multichannel thermal design for advanced cooling and acoustics for a quieter overall system under heavy workloads. For this desktop computer, no project is too big as it works with more flexibility. And it’s possible because of a new FlexBay design.
Dell Precision 5820 Tower Desktop
Available with Windows 11 or Windows 10, the Dell Precision 5820 Tower Desktop is a reliable option that improves productivity in every sense. The latest Intel Xeon processor in this desktop powers the most demanding applications. With its new generation of single-socket architecture with up to 18 cores, you can extract maximum performance for your projects.
The memory expandable machine up to 512GB of 2666MHz RDIMM ECC memory runs the software faster and provides real-time results. It also comes with a new multichannel thermal design that delivers advanced cooling and acoustics for enhanced cooling, meaning heavy workloads can be easily managed. Other than complex projects, this desktop handles virtual reality and AI workflow with the next-generation AMD Radeon Pro and the highest-performing NVIDIA Quadro RTX graphics. The workstation supports up to 600W graphics and up to 300W per card. Most importantly, the desktop has up to six 2.5” or five 3.5” drives and front access storage.
Dell OptiPlex 7770 All-in-one desktop computers
Available with Windows 11 Pro, the Dell OptiPlex 7770 All-in-one -desktop computer gives a smooth, versatile PC experience. The desktop keeps working at peak performance with its 9th Gen Intel processors up to Core i9 with up to 8 cores.
Its memory capability of up to 32GB of DDR4 2666MHz and a variety of storage solutions along with high-performance solid-state drives deliver a powerful and efficient work experience with zero barriers to success. The optional Intel Optane memory allows the launch of most-used files and applications in a flash, preloading and accelerating frequently used applications and files along with providing better responsiveness without compromising storage capacity. The look of the desktop is elegant because of the brilliant edge-to-edge 27” display with up to 4K.
Here, we have just discussed 5 popular desktop computers for home use. There are many other options as well with lots of unique features. To know more about the listed desktop computers and other options, please contact us at WhatsApp at +971585811786.
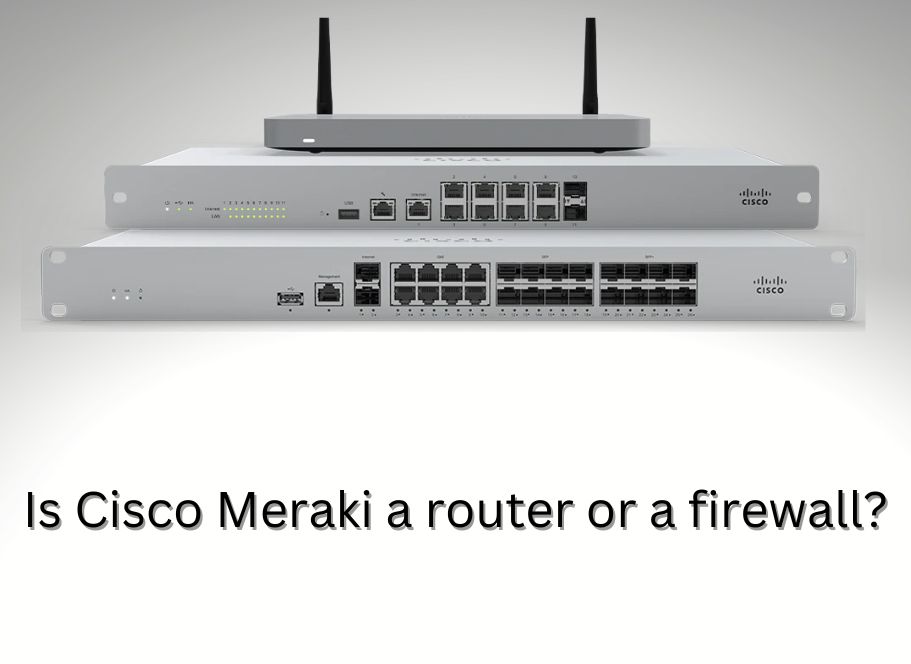
Is Cisco Meraki a router or a firewall?
The answer is – both. Cisco Meraki MX is an integrated router and next-generation firewall and can also act as a traffic shaper and Internet gateway. You can manage it centrally over the web. The MX series comes with a wide range of exclusive features. You can easily install, deploy, and manage it. It uses intuitive web-based administration, which means you don’t need to have specialized training and dedicated staff when using it. Its cloud-based centralized management allows you to build seamless multi-location networks, benefit from automatic firmware upgrades, and a lot more.
The Cisco Meraki MX series supports the leading intrusion prevention (IPS) with the help of an integrated Sourcefire engine. Intrusion prevention is carried out using pre-defined security policies which determine the level of protection you need. The Sourcefire engine refreshes the rulesets daily to ensure maximum protection against the latest vulnerabilities and online threats. These updates are pushed via the cloud to the MX devices used by customers within an hour. There is no need for manual staging or patching.
This Cisco Meraki appliance combines threat protection along with integrated malware/anti-phishing and cloud content filtering. As a result, network admins enjoy a robust security solution that is quite easy to deploy and maintains itself seamlessly.
Who Should Buy Cisco Meraki Firewalls and Why?
As more small businesses are exploring digital transformation and seeking all the advanced security and networking this transformation offers, the need for automated services is becoming even greater. Cisco Meraki Firewall appliances can fulfill these needs and are ideal for office branches, data centers, and distributed enterprise environments.
- Cisco Meraki MX series appliances provide small businesses with Unified Threat Management.
- Meraki firewalls are 100% cloud managed and equipped with comprehensive security features.
- They help reduce the complexity and save you money on multiple appliances because they are like an all-in-one appliance – routers, firewalls, internet gateway, and traffic shaper.
- Cisco Meraki MX firewalls facilitate easy intelligent site-to-site VPN with the Auto VPN feature. It automatically generates VPN routes using IKE/IPSec that can connect with all IPSec VPN devices and services.
- In case of a connection failure, automated MPLS to VPN failover is resolved in just a few seconds, keeping the downtime to a minimum over remote access.
- Cisco Meraki MX series has SD-WAN capabilities with each firewall. Software-defined WAN reduces operational costs and improves the performance of resources that are accessed remotely.
- These appliances include all the advanced security services that you can expect from a next-generation firewall.
What are the advanced security features offered by Cisco Meraki?
Cisco Meraki MX series appliances offer all the cutting-edge security features and services that next-generation firewalls come with. These advanced security features and services are as follows:
- Cisco-developed SNORT
- Content filtering
- Anti-malware
- Geo-based firewalling
- Remote access connectivity
- Advanced malware protection
- Layer 7 fingerprinting
The Layer 7 fingerprinting service allows businesses to identify PUAs and unproductive content so that the valuable bandwidth does not go waste on time-wasters such as BitTorrent.
How to Find the Right Cisco Meraki Firewall?
When you are choosing a firewall from the Cisco Meraki MX series (such as Cisco Meraki MX 100, 64, or 84), it can be challenging to spot the difference that helps you decide which one is more suitable for you. In such cases, the devil is always in the detail. Here are enlisted some of the main key differences that will help you find the best Cisco Meraki MX firewall for your network.
-
Power over Ethernet (PoE)
See if you need a firewall with PoE capabilities. Firewalls with PoE capabilities come with built-in power supply capabilities which allow you to install these devices even in those places where traditional power outlets aren’t available. Besides, this also reduces the need for separate power cables.
-
Wireless Firewalling Capabilities
Some of the Cisco Meraki firewalls offer wireless firewalling capabilities. This feature integrates Cisco Meraki’s leading wireless technology in an SMB-friendly compact form factor. This way, you will enjoy unified central management of all network security and wireless devices.
-
Virtual Firewalls
Virtual firewalls are also great because they provide you with the benefit of simple configurations and appliance-less deployment. Cisco Meraki MX100 is added via Amazon Web Services or Azure and can be configured directly in the Meraki dashboard just like you would manage any other firewall appliance.
-
Meraki MX 64 vs. MX65
While both models look similar and clock in at 200 Mpbs of Advanced Security Throughput and offer 100Mbps of VPN throughput, only MX64 can be converted to support WAN and it includes 3 dedicated GbE RJ45 interfaces. On the other hand, MX65 has reached the end of sale in 2019.
-
MX 100 vs. MX 64 vs. MX 84
MX 100 is recommended for businesses with 500 users and offers 500 Mbps VPN throughput. MX 84 is recommended for businesses with 200 users and offers 250 Mbps VPN throughput, and MX64 is advised for small branches with 50 users and offers 100 Mbps VPN throughout.
By now, you can easily figure out that the Cisco Meraki MX series is the best choice for small and medium businesses who want easy-to-deploy and easy-to-manage routers and firewalls within one appliance. Their stately features and security services make them ideal when it comes to networking and security.
Note that you will need to buy a PoE license for Cisco Meraki appliances separately.
If you are looking for Cisco Meraki routers and firewalls for your SME, please get in touch with us via WhatsApp at +971585811786.
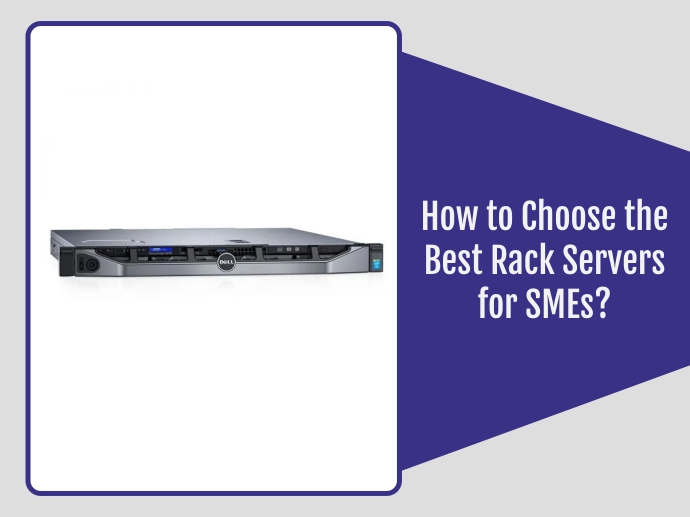
How to Choose the Best Rack Servers for SMEs?
A rack server is simply a server that functions like other servers, i.e. managing access and processing requests, but is designed specifically for a framework called a rack. A rack contains multiple slots where servers can be mounted. These slots are usually called bays and each of them is designed in a way that hardware can be mounted on it and secured to it using screws.
Unlike tower servers that are placed in an upright standalone cabinet, rack servers have low-profile enclosures, making them space-savvy. As a result, rack servers come with multiple benefits, for example, more rack server space saved, enhanced scalability, maximized airflow when combined with a cooling system, and ease of routine computer maintenance, and diagnostics.
The design of rack servers makes it easier and simpler for technicians and operators to slide rack servers onto the rack and get them out of it.
How to Pick the Right Rack Servers for Your Needs?
You need to know about the two most important measures when choosing the best rack servers for your SME. The first is FUNCTION and the second is the OPERATING SYSTEM.
When buying servers, small and medium enterprises should focus on their needs and resources, instead of opting for the most expensive and advanced servers available in the market. When you run a small business, you should not be paying more money for resources than you need and extra amount for resources that you don’t need.
However, SMEs should also account for resources that they will need during certain unexpected traffic surges. When buying servers, make sure that you consider all the functions of the server that it is going to serve you and the ones you actually need. For instance:
- Website hosting
- Application hosting
- Document storage
- Data backup
In addition to these, you need to keep in mind the following factors when buying rack servers for your small business.
- Operating system – Linux or Windows
- Customer support you are getting with servers
- A suitable control panel such as cPanel, Plesk, and WHM
- Special features such as redundant power supply, hot-swap, increased bandwidth, replacement warranties, etc.
- The size of your server such as 1U, 2U, or 4U
- Upgraded and advanced versions of software and hardware
- Costs of maintenance, software licensing, upgrades, scalability, etc.
Which is the best rack server for my small business?
Dell PowerEdge Rack Server Series Is the Best. Here is why.
While there are different brands that sell rack servers, Dell’s PowerEdge rack servers are more commonly used in the corporate world. They help you address the most challenging workloads, work autonomously, and also collaborate across all IT networks and infrastructure.
When used along with OpenManage integrated IT management system, PowerEdge rack servers also offer various other powerful automation and reporting features, allowing you to be free and focus on growing your business further.
However, with so many options in PowerEdge server series of Dell, it is easy to get confused and choose the best Dell servers for your business.
Here are some of the top Dell PowerEdge Rack Servers:
Dell PowerEdge R930 Server
This is the top server choice for SMEs that have more demanding requirements and need highly advanced servers. It accelerates enterprise applications and offers higher scalable processing, memory, and also internal storage. It has the following salient features:
- The fourth version of Dual Intel® Xeon® E7-4850 processor
- 128GB Memory
- Windows Server® 2012 Standard
- 4TB SAS Hard Drive
- A 3-Year ProSupport Warranty
- 4U Chassis
- 40M Cache, 8.0GT/S QPI
- 115W Turbo DDR4
- Dimensions: 6.8” (H) x 18.99” (W) x 31.59” (D) with PSU & Bezel) or 31.01” (D) with PSU and without bezel
Dell PowerEdge R830 Server
This server is known for delivering excellent performance and higher cost-effectiveness. It makes a good choice for those businesses that use mainstream databases virtualization, and VDI. It comes with the 4th version of Dual Intel® Xeon® E5-4620. The most important features and specifications of Dell PowerEdge R830 Servers are:
- 32GB Memory
- 300GB SAS Hard Drive
- Optional operating system
- Customizable
- 25M Cache
- 16GB RDIMM, 2400MT/s
- Up to 16x 2.5 inches of drive bays
- 2U Chassis
- Dimensions: 14.17″ (H) x 6.89″ (W) x 17.12″ (D)
Dell PowerEdge R730 Server
This PowerEdge 730 server is designed to adapt to virtually any workload. It is a scalable server that features an optimal mix of memory, storage, processing, and GPUs. Any SME business can choose this server to meet their server-related needs. Here are some key features of Dell PowerEdge 730 rack servers:
- Xeon E5-2630 v4 processor
- Optional operating system
- 16GB memory
- 2TB SAS H330 Hard Drive
- 16GB RDIMM
- 3 Year ProSupport warranty
- Dimensions: H: 3.44 in. x W: 17.49 in. x D: 26.92 in
Dell PowerEdge R630 Server
This Dell rack server is designed to maximize the efficiency of data centers and offers ultra-dense virtualization or database engine. It delivers excellent density and productivity and is very compact in size, reducing its footprint. Some of the key features of PowerEdge R630 are:
- Xeon E5-2640 v4 processor
- Optional operating system
- 32GB memory
- 1TB SAS H330 hard drive
- 3-year ProSupport warranty
- 1U chassis
- Dimensions: H: 1.68 in. x W: 18.98 in. x D: 29.72 in for 24 x 1.8” drive and 10 x 2.5” drive configurations or D: 27.57 in for 8 x 2.5” drive configuration
In addition to this, Dell PowerEdge 530 and 430 models are also widely demanded and commonly used in businesses with fewer demands.
For any queries or further information on Dell PowerEdge Rack Servers, please contact us via WhatsApp at +971585811786.
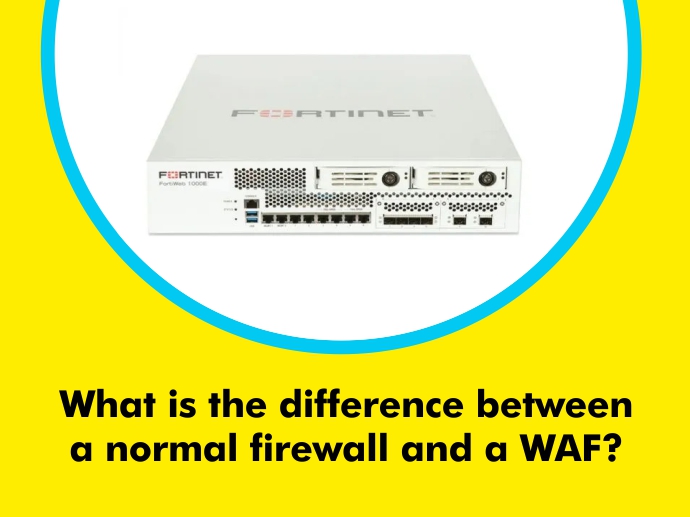
What is the difference between a normal firewall and a WAF?
Did your IT guy ask you to choose between a Web Application Firewall (WAF) and a normal Firewall? If yes, then what did you choose? Or, is the decision still pending?
It happens and it’s not just about you. Many people are unable to distinguish between a Web Application Firewall (WAF) and a normal Firewall. They don’t know which option would be better for them and their organizations. Sometimes, they end up choosing the wrong option and suffer severely.
To make your choice easy, we will discuss the difference between a Web Application Firewall and a normal Firewall based on different parameters.
They function differently
A normal Firewall is administered in a network while a WAF is deployed near the application. The positioning of a normal Firewall and a Web Application Firewall differentiates their functions. WAF focuses on ensuring the security of application network traffic. On the other hand, a normal Firewall on a network for protection and monitoring traffic.
They are placed in different locations on the network
A normal Firewall is placed near the edge of a network, making it a barrier between known and trusted networks as well as any unknown networks while a Web Application Firewall is placed before applications and servers, making it enabled to offer protection against any threat designed to attack servers. Compared to other differences, this is the most fundamental one. You can not consider others but it’s crucial to consider this.
They offer protection against different kinds of threats
A normal Firewall denies or permits access to networks, denying unauthorized access to networks. For example, some Firewalls block access to pornographic or questionable content from school computer labs. Sometimes, the Firewalls block computers in the lab from login into a LAN.
On the other hand, WAF offers protection to HTTP/HTTPS applications and servers, preventing threats like attacks via SQL Injection, and DDOS attacks, XSS or cross-site scripting attacks.
They concentrate on different layers of the OSI Model
OSI stands for Open System Interconnection. It’s a model describing seven layers used by a computer system to communicate over the network. In other words, the OSI model or layer is considered to be the map of a network. The inner workings and functions of a standard network are represented by the OSI layer.
A normal Firewall concentrates on layers 3 and 4. Here, layer 3 is concerned about the transfer of packets between nodes in the network while Layer 4 is concerned about the transformation of data to a destination host via a source.
On the other hand, WAF concentrates on layer 7, closest to the user. Unlike other layers in the OSI model, layer 7 is typically the software or interface. With this layer, the users interact with the network.
They offer different amounts of access control
A Web Application Firewall prevents attacks on applications by monitoring the network and not restricting any access. The thing is WAF doesn’t focus on access control or restrict access.
The control access of a normal Firewall is completely different. It’s the primary operation of the Firewall. A normal Firewall often comes with customized settings to serve users’ needs. Here, the Firewall acts to deny access to folders, websites, and networks. It only allows access to those with proper credentials.
They run different algorithms
Because of the difference in design and function, the algorithms run by a normal Firewall and a Web Application Firewall are different. The WAF runs Anomaly Detection Algorithms, Heuristic Algorithms, and Signature Based Algorithms.
On the other hand, a normal Firewall runs Proxy Algorithms, Packet-Filtering Algorithms, and Stateless/Stateful Inspection Algorithms.
They provide DDOS protection in different areas
Denial-of-Service, abbreviated as DDOS, is a type of attack that leaves the network in a crippled condition. DDOS work just like its name. It denies access to a network, flooding access points with extra overload.
Both a normal Firewall and a Web Application Firewall offer protection against DDOS attacks but the location of protection offered by them is different, meaning the areas of protection are different.
A WAF’s DDOS protection concentrates on the application layer. Here, the application layer is 7 of the OSI model. On the other hand, the normal Firewall allows protection against layers 3 and 4 of the Network Layer.
They have different modes of operation
The two modes of a Web Application Firewall are Passive Mode and Active Inspection Mode. Passive Mode operates without action, meaning passively. This mode effectively renders the application network not secure and is used for testing use cases only; while Active Inspection Mode continuously scans and offers protection against any kind of threat.
The two modes of a normal Firewall are Routed Mode and Transparent Mode. A Routed Mode Firewall operates on Level 3, executing static and routing protocols and acting similar to a network router; while, Transparent Mode works only on Layer 2, allowing transparent forwarding of data due to bridging of interfaces, bypassing Layer 3 thoroughly and completely.
They have different levels of application protection
Just like differences in Algorithms, the design, function, and operating location of WAF and firewalls play a major role in application protection. Just like differences in these factors, the application protection levels are different.
A normal Firewall operates in Levels 3 and 4 in the OSI Model so the focus of protection permits minimal attention to the application to the application level, allowing A Firewall to transfer data between networks.
Talking about WAF, it protects application layer 7 of the network, providing security to the entire application layer of the network. The application layer consists of applications, servers, software, and interfaces with which the user has direct access to the network.
A normal Firewall and a Web Application Firewall are very different from one another based on the factors mentioned above. So, choose wisely.
To know more about Firewalls, please connect with us via WhatsApp at +971585811786.
How to Configure Juniper Switch Step By Step
Juniper Ex Series switches are high-performance access and distribution devices that are cloud-ready for large networks in enterprise branches, campuses, and data centers. When you are using Juniper Ex switches, you can make your wired access networks simple and also reduce the risk and cost without compromising performance, quality, or innovation. These switches are easy to configure and manage and can be easily onboard and help operate campus fabrics by using Juniper Mist Cloud. By using Juniper Switches along with Juniper Wi-Fi products, you can create a unified wired and wireless solution which is driven by Juniper Mist AI.
In this guide, you will learn how to configure Juniper Ex Series Switches.
In general, there are two ways to connect and configure the Ex-Series switches of Juniper.
- Using CLI
- Using J-Web Interface
How to Do Initial Juniper Switch Configuration Using CLI
To configure your Juniper switches initially with CLI, you will need to follow the below steps:
- Connect the console port of the switch to your laptop or PC. You can use RJ-45 to DB-9 serial port adapter. You get both RJ-45 cable and RJ-45 to DB-9 serial port adapter along with your switch.
- You will get a prompt where you need to type ezsetup.
- Then, enter the hostname and root password. You will be re-prompted to enter the root password.
- To enable services such as telnet and SSH, enter yes.
- Then, you will need to select any one of the switch management options based on your needs. These options are:
- Manage the switch using the default VLAN: With this option, all data ports are configured as members of the default VLAN. You can specify the management and gateway address for the default VLAN and can use this IP address for switch connection.
- Manage the switch using the management port: When choosing this option, you will need to specify the IP address and gateway of the management interface. You can use this IP address to connect to the switch.
- To configure optional SNMP parameters, enter the details of the SNMP Read community, location, and contact.
- Then, you can specify the system date and time and select the time zone from the provided list.
- Enter yes to apply and save the configuration.
Make sure that you complete the initial Juniper switch configuration without taking any pause. If you take a long pause and the process times out, then you will need to do it all from start.
How to Do Initial Configuration using J-Web Interface
When you switch on the Juniper Ex-series switch for the first time, it automatically runs as an unmanaged layer 2 switch. To transfer the switch into Ezsetup mode, you can navigate the steps easily through the LCD menu and simply select ezsetup.
Then the switch starts with the below-given initial configuration.
Here, Port 0 works as the DHCP server and is configured with the default Layer 3 IP address 192.168.1.1.
The port 0 of DHCP server contains only one IP address i.e. 192.168.1.1.
Here are the steps to configure your Juniper switch using the J-web interface:
- Insert one end of the Ethernet cable into the Ethernet port located on the laptop or PC.
- Connect the other end of the Ethernet cable to port 0 on the switch.
- Open your web browser. Type the URL https://192.168.1.1 in the address search bar on the top. This will bring the EZSetup Wizard to your screen.
- Click Next when the introduction window appears.
- On the page Basic Settings, change the hostname and the root password. Also, modify the date and time settings. You will need to enter the password twice. Besides, you need to select the option Switch data and time to modify the date and time settings.
- Specify the time zone properly and make sure to synchronize the date and time settings of the switch with the management console. Alternatively, you can set them manually. Then, click Next.
- You will see three options on the Management Options page. To configure a switch, you will need to select one of them.
- In-band Management-Use VLAN ‘default’ for management: Configure all data ports as members of the default VLAN and click Next. Assign the management and gateway address for the default VLAN and you can use this IP address to connect to the switch.
- In-band Management-Create new VLAN for management: Click Next and then assign the IP address and gateway of the management interface. Utilize this IP address to connect to the switch.
- Out-of-band Management-Configure management port: If you want to create a management VLAN that consists of uplink ports, then select this option. Click Next and specify the name and ID for the new VLAN in the Management Address screen. Choose the uplink ports and finally set up the IP address and gateway for the VLAN.
- Click Next. You will see the Manage Access page.
- Select options to enable services such as telnet and SSH. Set up the SNMP Read Community, Location, and Contact to configure SNMP parameters. Note that all the settings on the Manage Access page are optional.
- Click Next. The summary screen will display all the configured settings.
- Finally, click Finish.
Based on your preference, you can choose any of the above two methods.
For any queries regarding the purchase of Juniper Ex-Series switches, please contact us at +971585811786.
A Complete Guide on Cisco Router (and How to Update it)
A Cisco router is a networking device that receives and sends data on computer networks. It is most often confused with network hubs, modems, or network switches but is an entirely different device. This device combines the functions of these devices and connects with these devices to improve the accessibility to the Internet or create business networks.
How does a Cisco router work?
Cisco routers are networking devices that are meant to guide and direct network data through packets. These packets contain different kinds of data, including files, communications, and simple web interactions.
A data packet consists of several layers or sections, one of which contains information that helps its identification. This information includes the sender IP address, data type, size, and the destination IP address.
The router is designed to read this layer, prioritize data accordingly, and select the best route for each transmission of data.
How is a Cisco router used for business?
Cisco routers have become a common tool for modern network computing as they connect employees to local networks and the Internet, where every business activity (such as application use, video conference, download, and web interactions) takes place. If there is no router, you cannot use the Internet to collaborate, communicate, and gather information.
In addition to guiding and directing data packets, a router also provides security. Firewall and content filtering software embedded in routers makes it possible to provide additional protection from malicious content and websites without interrupting the online experience.
Besides, a router also helps you to connect hard drives and use them as file-sharing servers or printers that can then be accessed by anyone on the network.
Read About: Top 5 Cisco Routers For Small and Large Businesses
What are the different types of Cisco routers?
Generally, there are five types of Cisco routers that can be used when building business networks and accessing the Internet.
Core Routers
These routers are most suitable for service providers (such as Vodafone and Verizon) and cloud providers (Google, Amazon, and Microsoft). These devices provide maximum bandwidth to connect additional routers or switches and are not needed for small businesses. Sometimes, they are used by larger organizations that have multiple buildings.
Edge Routers
Also known as gateway routers, edge routers act as a network’s outermost point of connection with external networks, including the Internet. They are optimized to provide higher bandwidth and designed to connect to other routers to distribute data to end users. They usually come with Ethernet ports to connect to the Internet and don’t offer Wi-Fi or the ability to manage local networks fully.
Distribution Routers
A distribution router or an interior router is designed to receive data from the edge router via a wired connection and sends it on to end users with Wi-Fi. However, a router usually has Ethernet connections to connect to additional routers or users.
Wireless Routers
Wireless routers, often called residential gateways, offer the combined functions of both edge routers and distribution routers. They are commonplace routers widely used for home networks and Internet access.
Virtual Routers
A virtual router is available in the form of software that enables some router functions to be virtualized in the cloud and delivered as a service. Ideal for large businesses with complex needs, virtual routers offer high flexibility, easy scalability, and a lower entry cost. They also offer the benefit of local network hardware.
How to Buy the Best Cisco Router for My Small Business?
When buying Cisco routers for your small business, you can determine the right router by keeping the following parameters in mind:
Connectivity: Check the number and types of ports such as phone, Ethernet, cable, and USB and see if you can connect the necessary devices in your office with it. Always remember that it is okay to have unused ports but a lack of ports can lead to problems as many devices won’t be connected to the network and Internet then. On the other hand, having unused ports allow you to expand the network as needed.
Bandwidth: To provide a smooth user experience, bandwidth must be sufficient. It helps you ensure maximum performance even when multiple users are connected. The more users you have, the greater bandwidth your router should support. Otherwise, it can lead to bottlenecks. If necessary, you can expand your business’s network by adding more routers or hubs.
Wireless Feature: Wi-Fi comes with routers but there are different standards. The best choice is to go with Wi-Fi 6 (802.11ax) as it delivers much higher transmission speeds, especially when multiple access points get connected at once. This standard Wi-Fi is also backward compatible with old standards.
Easy Setup and Management: Most routers offer a browser-based interface that connects directly to the router to help with the setup and admin. However, modern Cisco routers also come with mobile apps that provide more intuitive interfaces for easier setup.
In addition to the above parameters, you should also check if a router comes with the following features and capabilities:
- Flexibility
- Security
- Guest networks
- User changeable configurations
- Quality of Service (QoS) controls
- Automatic updates
- Mesh networks
How to Upgrade My Cisco Router
Before upgrading your Cisco router firmware, you need to make sure that you have a sufficient disk or flash memory to store Cisco IOS, sufficient DRAM to run Cisco IOS, the new Cisco IOS supports all interfaces and modules in the router, and the new Cisco IOS supports all features used with previous Cisco IOS.
Steps to Upgrade Cisco Firmware
- Go to Network Configuration Manager and download the Cisco IOS software image onto the TFTP server.
- Verify if the TFTP server has IP connectivity to the router by checking that the router interface and TFTP server must have an IP address in the same range or a default gateway configured.
- When the connection is set up, copy the IOS image to the router from the TFTP server.
- Save your configuration to the router and reload it.
- Once the router reload is complete, the router will run desired Cisco IOS image.
For more information or queries on Cisco routers, please connect with us via WhatsApp at +971585811786.

Can we use Non-HPE Ink Cartridge in an HPE Printer?
In general, an HPE or HP printer doesn’t recognize the new ink cartridge and toner if it is generic, or say non-HP ink or toner. HP doesn’t want its consumers to use cheap, low-quality ink cartridges and hence, has made them incompatible with its printers. Using HP brand ink cartridges and toners makes sure that HP delivers on its promise of high print quality, long printer life, and other features. However, using non-HP toner or ink defeats the entire purpose of crisp and sharp images.
Why is my HP printer not recognizing the new ink cartridge?
Recently, HP introduced a new setting called cartridge protection on its original and genuine ink cartridges. This system locks the original ink cartridges into specific HP printers so that you cannot use them with other printers.
For example, assume you already have an HP OfficeJet Pro 251dw printer. But now, you want to purchase a brand new HP OfficeJet Pro 8600 printer that uses the same ink cartridges 950 and 951. Unfortunately, you won’t be able to use these cartridges in the new printer because they are designed and locked only for the old HP printer you have.
Additionally, you can also not refill, recycle, or remanufacture these ink cartridges for use in a different printer because the HP printer and its Cartridge Protection feature will not allow it.
So, you will need to buy new ink cartridges that are compatible specifically with your HP printer.
Can I disable HP Cartridge Protection to use other cartridges?
Yes, there are many reasons due to which a lot of people disable HP cartridge protection. Some of these are you cannot use remanufactured HP ink cartridges, you cannot use existing cartridges on a new printer, you cannot recycle these cartridges, and sometimes, this setting can also work against brand-new genuine cartridges.
How Do I Disable HP Cartridge Protection on HP Printer?
You can disable HP cartridge protection with some simple steps with or without the Internet.
If you don’t have Internet:
- Go to Printer Menu and Printer Settings.
- Locate the option to disable HP cartridge protection and select it.
- Finally, click on Apply & Save.
If you have Internet:
- Open your web browser and type your HP printer’s IP address. You can find the IP address of your HP Printer in Printer Settings > Network Setup.
- When the printer’s Embedded Web server opens, then go to Settings and then HP Cartridge Protection.
- Click on the disable option and Apply or Save.
There is also another way to disable HP Cartridge Protection from Windows PC.
- Go to Control Panel > Printers and Devices
- Locate your printer and right click on your printer.
- Select Properties given under the software tab.
- You can find there an option to disable the Cartridge Protection.
Can I use other ink cartridges and toners in my HP printer?
The answer depends on what type of another ink cartridge you plan on using in your HP printer. If it is a third-party or generic compatible or remanufactured ink cartridge of the same model number, then yes, it might work if HP Cartridge Protection is disabled. Sometimes, you might get an error message that you are using a non-OEM ink cartridge. You can bypass it by clicking OK and continuing printing using generic ink.
In case you are using an ink cartridge from another brand in your HP printer, then it will not work. For instance, you cannot install a Canon ink cartridge in an HP printer and vice-versa is also true. Besides, you can also not interchange different cartridge models even if they are manufactured by the HP brand. Even if an HP 301 ink cartridge perfectly fits in an HP 304 printer, it is not going to work. The printer will instantly display a message of “ink not recognized” and there is no way to bypass it.
Why does my HP printer display a message that it has an ink cartridge problem?
There could be several reasons why an ink cartridge is not working. Most solutions can be resolved by using the right ink cartridge brand and model. However, sometimes, printers have problems that can be easily fixed.
If your printer is also saying that it has an ink cartridge problem, you can try the following tips:
-
Clean the contact points of the ink cartridge:
One of the common reasons why your printer is having a Cartridge problem is that it has a dirty or damaged gold contact on the cartridge chip. To solve this problem, first remove your ink cartridge from the printer. See where its chip is located and then make sure that the gold contacts on the chip are clean by wiping them down with a lint-free cloth. You can also use an alcohol-based cleaning solution or cartridge flush to remove any dirt or residue trapped in the nooks and corners.
-
Clean the contacts inside the printer:
If you are still facing the same issue, you can try cleaning the contacts inside the printer. To clean the contacts, open your printer, find the contacts where an HP cartridge attaches to it, and then clean it just the way you cleaned the contacts of your cartridge.
-
Try another ink cartridge:
If your issue is still not resolved, then there might be a chance that your ink cartridge has an electronic problem that you cannot detect with the naked eye. In this case, you can try using another ink cartridge and see if it works.
Are you looking for HPE accessories? Connect with us via WhatsApp at +971585811786.

How to Choose the Best Dell Laptop In 2023?
Despite being from the same manufacturer, the best Dell laptops are surprisingly diverse. Dell manufactures machines suitable for all hobbies, professions, and budgets (including students heading back to school). Yes, a flagship XPS workstation laptop can be very expensive, but the Inspiron series is very affordable and is frequently found in schools and workplaces. Whatever your needs are, Dell almost certainly has a device to meet them.
There are several reasons why Dell laptops are great, but one of the most important is that the best Dell laptops always have excellent hardware specs. The company’s most recent devices include powerful and efficient 12th Gen Intel CPUs, cutting-edge DDR5 RAM, and an abundance of fast SSD storage.
Best Dell Laptops to Buy In 2023
-
Dell XPS 15 (2021)
If you’re looking for a Windows-based laptop that can compete with a MacBook Pro, the Dell XPS 15 should be at the top of your list. It not only provides incredible performance thanks to the latest generation of components powering this bad boy, but it’s also stylish and lightweight.
- Outstanding performance
- Stunning 3.5K OLED display
- Three Thunderbolt, 3 ports, and an SD card slot
Specifications
CPU: 11th gen Intel i5/i7/i9
Graphics: Intel UHD/NVIDIA GeForce RTX 3050 /
RAM: 8GB/16GB/32GB/64GB
Screen: 15.6-inch 3.5K OLED
Storage: 256GB/512GB/1TB
-
Dell Inspiron 15 3000
The Dell Inspiron 15 3000 is an excellent budget-friendly laptop for those who simply need to connect to the internet but cannot use a Chromebook. In fact, because of their affordability and dependability, Inspiron devices are very popular in schools, colleges, and workplaces. As a result, this model is an excellent choice for students
- Large 15.6-inch screen with enough power for daily tasks
- A sufficient number of ports
Specifications
CPU: Intel Celeron / AMD Ryzen 3 – Intel i7 / AMD Ryzen 5
Graphics: Intel UHD Graphics 605 / AMD Radeon Vega 8RAM: 4GB-8GB
Screen: 15.6-inch (1366 x 768) HD
Storage: 128GB / 512GB SSD
-
Alienware m17 R4
Despite its name, the Alienware m17 R4 is a Dell-branded product since the two companies merged several years ago. Although it’s marketed as a gaming laptop, it has many features that creatives will appreciate.
It is a great value for your money because it works well for 3D modeling and game development.
- Lightning-quick performance
- Effective elements
- Stylish chassis with lots of RGB lighting
Specifications
CPU: 10th-gen Intel Core i7 – i9
Graphics: NVIDIA GeForce RTX 3070 – 3080RAM: 16GB – 32GB DDR4 2933MHz
Screen: 17.3″ FHD (1920 x 1080) 144Hz 7ms 300-nits – 17.3″ UHD (3840 x 2160) 60Hz 25ms 500-nits
Storage: 256GB PCIe M.2 SSD – 4TB RAID0 + 512GB PCIe M.2 SSD
-
Dell G15
The Dell G15 is another gaming laptop, but you might prefer it to the Alienware above due to its more affordable price and understated design, which trades in an RGB-infested, alien-branded chassis for something that would look good in a classroom or office.
You can configure the device in a variety of ways to meet your specific needs.
- Reasonably priced for a gaming laptop
- FHD LED display with anti-glare
Specifications:
CPU: 11th Generation Intel Core i5 – i7
Graphics: NVIDIA GeForce RTX 3050 – RTX 3060RAM: 8GB – 32GB
Screen: 15.6-inch FHD (1920 x 1080) Anti-glare LED-Backlit Non-touch
Storage: 256GB SSD – 1TB SSD
-
Dell Precision 5760
As a true workstation rather than a gaming laptop, the Dell Precision 5760 embodies professionalism. It makes up for what it lacks in flashy RGB lighting with raw power and performance.
- Impressive FHD WLED display
- Sufficient power for most demanding applications
- Modern, slim design
Specifications
CPU: 11th generation Intel Core i5 – Intel Core i9
Graphics: Intel UHD Graphics – NVIDIA RTX A3000RAM: Up to 32 GB DDR4 3200MHz
Screen: 17-inch WLED FHD+ Anti-Glare Non-touch display with 500 nits and 60 Hz
Storage: 256GB – 512 GB SSD
-
Dell Inspiron 15 2-in-1
People who value utility and portability over high hardware requirements will do well with the Dell Inspiron 15 2-in-1. Due to its tablet-inspired design, graphic designers and other creative professionals can quickly alter their work on the fly without having to lug around a graphics drawing tablet.
- Competent performance to the XPS
- Premium design is highly versatile
Specifications
CPU: 11th Generation Intel Core i5 – i7Graphics: Intel Iris XE
Graphics RAM: 8GB – 16GB
Screen: 13.3-inch FHD (1920 x 1080) – 15.6-inch UHD (3840 x 2160) Truelife Touch Narrow Border WVA Display with Active Pen support
Storage: 256 GB SSD – 1TB M.2 PCIe NVMe SSD
-
Dell XPS 17
The Dell XPS 17 is a better option if you value the same features of the aforementioned 15-inch model but prefer using a larger screen. This makes it ideal for creatives who will value the extra space.
This is because of the enormous 17-inch 4K display is perfect for graphic design, photo editing in Adobe Lightroom, and editing 4K videos. You can be confident that the screen is of the finest quality.
Specifications
CPU: 11th Generation Intel Core i5/i7/i9
Graphics: Intel UHD/NVIDIA GeForce RTX 3050 / GeForce RTX 3060RAM: Up to 64GB DDR4-3200MHz
Screen: 17.0″ FHD+ (1920 x 1200) InfinityEdge Non-Touch Anti-Glare 500-Nit – 17.0″ UHD+ (3840 x 2400) InfinityEdge Touch Anti-Reflective 500-Nit
Storage: Up to 4TB M.2 PCIe NVMe
The year 2023 is almost here, so go ahead and cross everything off your electronic to-do list so you can use your new laptop to start the next year.
Contact us via WhatsApp at +971585811786 to order Dell laptops and get quick delivery.
Cisco Router Not Working Issue | How to Fix?
Cisco routers are commonly used in businesses, big or small because of their excellent speed and reliability. However, if your Cisco router stops working, you might wonder how to fix it quickly. There could be several reasons why your Cisco router is not working.
Some of the common glitches that Cisco router users face are:
- Not being able to change the Cisco router password
- Cisco router connectivity issue
- Too low speed of the router
- Having configuration issues
- A problem in Cisco password recovery and setup
- Installation and configuration issues of Cisco switches
- Incorrect configuration of the router
- Not being able to fix the router with simple tricks
- Weak flag problem
- Unable to reset the router
- Networking problem
If your router is not working and you don’t have any idea about the reason behind it, you can try the following tips to fix your Cisco router.
-
Reboot Your Router and Connected Devices
Most often, the first step to fix a not working router is to reboot it and the connected devices. Here is how to reboot your Cisco router:
- Switch off the power of the router and the PC.
- Remove the power cable of the router and the connected devices from the wall socket.
- Unplug the Ethernet cables from the back of both these devices and wait for half a minute.
- Put back the Ethernet cables you removed from the router and the PC.
- Switch on the power of the router and the PC.
-
Try Changing the Router’s Wi-Fi Frequency
In case the frequency of the wireless network is not set correctly, you might face the problem of “Cisco Router Not Working” once in a while. You can set the Wi-Fi frequency of the router by following the below steps:
- Open your web browser. Type “192.168.1.1” in the URL box and press Enter.
- Once the router login page opens, leave the blank “username” box. Go to the password box and type “admin” and click OK.
- Go to the Router configuration page, then the left panel. Select the wireless option and go to the wireless settings page.
- In this section, select ‘channel’, and from the drop-down menu, choose either 2.4 GHz or 5GHz as per user traffic.
- Click Save and exit from the router settings page.
- Now, see if your router is working properly or not.
-
Eliminate Hindrance that Blocks Wi-Fi Signal
If there is some kind of hindrances such as a wall or floor bricks that are blocking the Wi-Fi signal, you can take the following steps:
- Position the router in the middle of your house or office so that you can receive a good wireless signal.
- Confirm if there are any obstructions in the coverage area of the router.
- Do not place your router near a wall or ceiling. Maintain a distance of at least 2 feet and see if the connection improves.
- Make sure that you don’t place your router near certain devices such as TV, cordless phone, or microwave.
-
Enable the WLAN Auto Configuration Feature
The WLAN Auto-Configuration feature is used for the auto-configuration of connectivity settings and wireless security. Here is how you can enable the WLAN Auto-Configuration feature:
- Press the Window and R keys at once and open the Run dialog box.
- Enter “service.msc” and click OK.
- You will see a new “services” window as you have services for all plans set up inside the computer in a list.
- Locate and select the WLAN ‘auto-configuration’ service. Right-click on the service and select the open “Properties” from the pop-up window.
- Now, you will see a new window of WLAN auto-configuration properties. In this window, click on the General tab and find the section “Start-up Type” from the drop-down menu. Now, click on the “Automatic” option.
- Click on “Apply” and then OK.
-
Re-activate Wi-Fi Service
If your Wi-Fi service is deactivated, then your Cisco router might not work properly. In that case, you can fix your router by taking the following steps:
- Go to the Start button and type Network in the search box.
- Under Control Panel, you will find Network and Sharing Center.
- Open Network and Sharing Center and go to the left panel.
- Select the “Change the Adapter Settings” link. It will open Network Connections.
- On the same page, select the wireless network to which you are connected currently. Right-click on the selected network and click on ‘enable’.
- If the network is already enabled, then disable it and then again enable it.
- Once the Wi-Fi service is active, restart your computer and see if the Cisco router works now or not.
-
Update the Wireless Network
- Go to the Start button and type Device Manager in the search box.
- In the Device Manager window, you will find all the devices and their relevant drivers in a list.
- From the list, select “Network Adapters”. Tap on the arrow icon to see an expanded sub-list. This list includes driver network adapters.
- In the expanded sub-list, select primarily driver, right-click on it, and update driver.
- A new window will open with two links. Select Search Automatically for updated driver software.
- If the driver needs an update, it will automatically be downloaded and installed. Wait for some time to complete.
- Now, restart your PC.
If you have any queries or you want to buy Cisco routers, please contact us via WhatsApp at +971585811786.
Which Is Better Hikvision Or Dahua Cameras?
When we discuss the best brands for security cameras, the two names that instantly come out are Hikvision and Dahua. There are others as well but not as popular and reliable as these two brands. Though they have sold massive numbers of cameras and recorders across the globe and users are satisfied with what they deliver, they constantly advance present or upcoming features in their products. They aren’t satisfied with the revenue they get from existing products; they prefer staying updated and offering the latest products to their customers.
As Hikvision and Dahua hold good positions in the market, people are often confused about which one to choose and why. They often end up deciding based on the price and leave the other things aside.
In this post, we will try to eliminate your confusion and help you pick the right option based on your requirements. We will discuss the differences between Hikvision and Dahua cameras.
Hikvision cameras– The most unique thing about Hikvision is that it devotes 8% of its revenue to research and development. So, you can imagine how particular the brand is about its products’ features and specifications.
The Hikvision cameras are user-friendly and highly capable, compared to other brands in the market. Also, the cameras are exceedingly simple to install. Other features that define the capability and efficiency of the Hikvision cameras are adjustable video footage capacity, cloud support, customizable search and playback, enhanced diagnostics and configuration, footage tagging, multi-channel live view, network detection, simultaneous HDMI and VGA outputs and smart playback.
Other than this, the Hikvision cameras can easily be integrated into not only a system of a matching brand but also those of others as well.
Read About: Which is The Best Camera for Home Security?
Dahua cameras- Dahua offers three distinct types of security cameras: UltraSeries, ProSeries, and LightSeries. They are not just different by names but by features as well. The LightSeries is the most basic option, ProSeries is the middle ground and UltraSeries is the best that the company offers.
The preferred options are UltraSeries for larger businesses and companies and LightSeries for homes and small businesses. Everything or everyone falling between these categories uses the ProSeries.
Difference between Hikvision and Dahua Cameras based on certain parameters
Lens options– Compared to Dahua, Hikvision offers more options for lenses. The five typical fixed lens options offered by Hikvision are 2.8mm, 4mm, 6mm, 8mm, and 12mm. On the other hand, the fixed lens options offered by Dahua are 2.8mm, 3.6mm, and 6mm.
Every lens offers a different individual security camera, meaning more camera choices in Hikvision with lots of specifications. But, the only thing is that the performance of the lenses depends on the environment. For example, you cannot use a 2.8mm lens in the area where a 12mm lens is used or vice versa.
Size of the sensor– Regarding this parameter, both brands are typically the same. The industry standard for the size of the sensor is ⅓ inch. This is reliable due to its capability in low conditions. The sensor defines the look of the resulting resolution on the video footage.
The internet protocol cameras from both manufacturers are nearly the same but some specific cameras like the turrets manufactured by both companies are different. If compared specifically, the sensor size of the Dahua is favorable as their turret cameras see farther and with more details in low light conditions.
Software– Just like the size of the sensor, the software of Hikvision and Dahua is relatively similar. You will find a similar video management software and configuration for setup. A few features that both the brands support are alarm integration, facial recognition, motion detection, reduced false alarm, and video footage settings management.
The distinct difference between the software of Hikvison and Dahua is the detection of unusual behavior. Here, the stronger one is Hikvision cameras. The software in the IP security camera of Hikvision allows focusing and recognition of faces when linked to a database for reference. When connected to artificial intelligence, the cameras can detect an unusual aspect in any given environment, like dropped or left objects.
The number of unique video streams in Hikvision is two while Hikvision produces three. The resolution of each video stream is uniquely different in resolution to others if one chooses to use more than one. Regarding the interface, both Hikvision and Dahua cameras use ethernet cables or Power over Ethernet.
Bitrate and resolution– The resolution depends on the size of the sensor. In the case of resolution, Dahua cameras have an upper hand as they have a larger sensor. Another reason for superiority is the very little noticeable difference between the two types of cameras.
Regarding bitrate, the option is the opposite. As Hikvision cameras provide more megabits per second than the Dahua alternative, they produce double the bitrate than the Dahua. Another reason is that both manufacturers have similar types of compression.
Price– On average, Dahua cameras are a bit more affordable than Hikvision but the latter option provides more features. Just like three camera options, Dahua features three price ranges. The price range of the Dahua cameras decides the features included in them.
On the other hand, Hikvision produces more products to do the same, including superior software and hardware. This is why Hikvision is costlier than Dahua.
What should you choose?
If your budget is tight and there is no scope of increasing it, you should choose Dahua security cameras. But, if you want more features for better results and budget is not an issue, you should choose Hikvison cameras.
To know more about Hikvision and Dahua cameras, please connect with us via WhatsApp at +971585811786.
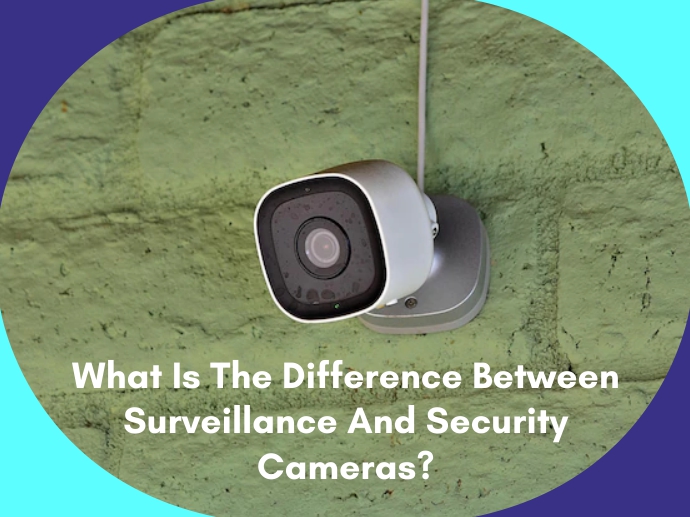
What Is The Difference Between Surveillance And Security Cameras?
By installing cameras at your home or office, you can be there 24/7. You don’t have to be physically present to know what’s happening in your home or office. The best thing is you can find out what happened in your absence and check the details by reviewing the footage later. You don’t have to stream the video live to know the status of your home or office and get proof of any incident.
The two options that home or business owners prefer to improve their security are surveillance and security cameras. But, it becomes very difficult for them to choose one option that would fit their requirements. And it’s all because they don’t know the difference between surveillance and security cameras. Many of them consider these two options as the same and choose randomly.
In this post, we will brief you about surveillance and security cameras and the differences between them based on different parameters.
Surveillance cameras
Primarily installed in public places to continuously record an open area, the surveillance cameras typically work in tandem with security systems. They provide security and deter criminal activities. The recording from these cameras is also used as evidence if a crime occurs.
Operating on an IP network, the Surveillance cameras connect the camera from a remote system and transfer the video to a secure location. Due to this feature, they allow for a longer recording time, making them ideal for surveillance purposes.
Compared to security cameras, surveillance cameras are costly and complex to install. It’s because many features in surveillance cameras require integration with complete security cameras, which also include video screens to monitor activities captured by the cameras.
The major advantage of surveillance cameras is remote monitoring. You can easily monitor the area, no matter where you are, using your computer, laptop, and mobile device.
Security cameras
Also known as CCTV cameras, security cameras can be installed everywhere, unlike surveillance cameras that can only be installed outside. You can have security cameras inside and outside of your home or office. They transmit signals from a specific area to a distant monitor and monitor the things that you value the most.
Compared to surveillance cameras, security cameras are easy to install. Many people prefer installing security cameras themselves. In some conditions, professionals are called to install security cameras.
Security cameras conserve energy and bandwidth because they only record when motion is detected. No matter if it’s day or night, the advanced motion sensors and infrared night vision technology of the security cameras detect movement. The best thing is that security cameras allow you to see the area in high definition, providing clear visuals. This helps you to check the footage precisely and spot even the smallest thing in it. Other than this, security cameras can be combined with other security solutions such as doorbells. With this, you can speak with the person at your door.
As security cameras have high-quality video and audio, they make it easier to identify criminal perpetrators.
Difference between surveillance and security cameras
Function of devices
Installed in public areas, the surveillance cameras monitor them, usually from a distance. On the other hand, security cameras don’t have control over the environment they are watching. The security cameras simply record what happens in front of them and send the footage to a recorder. The footage is sent digitally or via cable wiring.
Security cameras detect motion within a specific area, sending an alert via email, text message, or mobile app. Also, they allow remote monitoring and viewing in real-time.
Technology in devices
With surveillance cameras, you can monitor and control a specific property. The entire network comprises surveillance cameras, which are frequently connected to IP networks. The IP networks connect remotely to the central location of cameras.
On the other hand, security cameras collect video feeds from all connected cameras and send them to the receiving equipment, including the monitor. Here, a coaxial cable is used to make connections between the cameras and send the video feeds.
Features of devices
Using digital signals, the surveillance cameras transmit recorded video to a recorder via a single cable. As a result, they eliminate the need for multiple power cables.
On the other hand, security cameras require cables to transmit video feeds to a limited number of monitors. For proper visibility and better performance, they should be strategically placed in a single location.
Applications of devices
Both devices are widely used but there are some specifications. Surveillance cameras simply monitor a specific area so they are suitable for controlling any undesirable situation.
On the other hand, security cameras manage the security of public and industrial facilities. They can even be combined with intrusion detection to provide enhanced protection.
What should you choose?
The choice between surveillance and security cameras depends on your house or office requirements. If you simply want to keep an eye on things without having someone physically watching you at all times, you should choose surveillance cameras. On the other hand, if you want to detect motion and begin recording footage automatically, you should choose security cameras. The thing is how you determine your requirements and fit them with the features of the surveillance and security cameras.
To know more about surveillance and security cameras, please get in touch with us via WhatsApp at +971585811786.
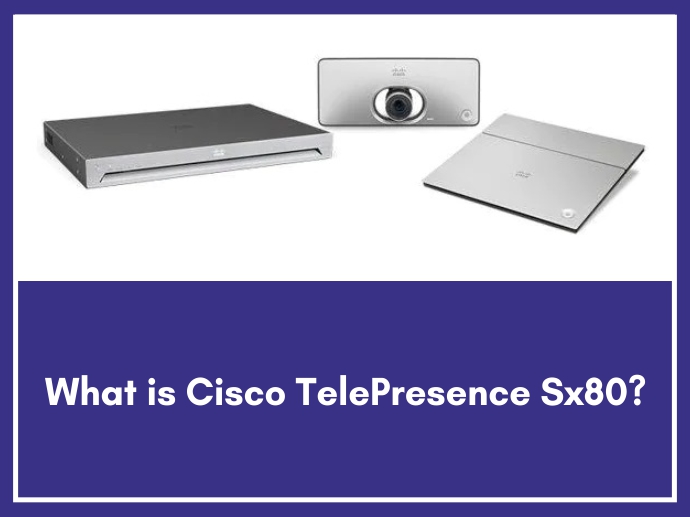
What is Cisco TelePresence SX80?
To create video collaboration solutions for every room, the Cisco TelePresence SX series is a suitable choice. There might be other options as well in the market but none of them is better than the brand Cisco. The Cisco TelePresence SX series is a powerful and flexible technology platform designed for integrators. With this, you can make your small huddle space into large, customized board rooms.
The Cisco SX series is categorized into Cisco TelePresence SX Codec and Cisco TelePresence Quick Set (SX10 and SX20) with different features and capabilities.
In this post, we will discuss Cisco TelePresence SX80 Codec in detail. We will mention its features, reasons to use it along with the installation steps.
Cisco TelePresence SX80 Codec
For creating an individual video collaboration experience, the Cisco TelePresence SX80 Codec is preferred because it is a powerful and flexible platform. The codec is feature-rich that helps to deliver the ultimate in high-definition video and high-fidelity audio. The best thing about the Cisco TelePresence SX80 codec is that you can customize large video collaborations limited only by your imagination into large meeting rooms, boardrooms, and purpose-built or vertical application rooms.
The codec is available in three different integrator packages. You have the option to choose from different cameras, which also include the unique SpeakerTrack 60 dual camera active-speaker tracking system. These packages reduce the need for external equipment and the overall cost of enabling video in larger meeting rooms.
The packages are:
- For smaller rooms, SX80 Codec and PrecisionHD 4x camera
- For larger rooms, SX80 Codec and Precision 60 Camera
- For others, SX80 and the SpeakerTrack 60 dual camera system with active speaker tracking.
Reasons to use Cisco TelePresence SX80 Codec
The Cisco TelePresence SX80 Codec is the first video conferencing codec to support H.265, laying the foundation for future bandwidth efficiencies made possible by the standard. It delivers up to 1080p60end-to-end high definition (HD) video. Other than this, the codec offers rich input and output settings as well as a flexible media engine. Also, it supports up to 3 screens, enabling a variety of use cases adaptable to your specific needs.
Summarizing the benefits of Cisco TelePresence SX80 Codec,
- Ultimate HD video & audio quality
- A dual camera system (Speakertrack 60 camera) with intelligent active speaker tracking for the meeting space
- Complete control with Cisco Touch Devices
- Cloud registration to Cisco WebEx Teams is available
- Suitable for team-based collaboration in boardrooms and meeting rooms
How should you install Cisco TelePresence SX80 Codec?
Cisco TelePresence SX80 Codec is available as a single unit or in integrator packages. In the single unit, you will find a power cable and basic mounting parts. On the other hand, you will find the following things in an integrator package:
- Cisco TelePresence SX80 codec
- Cisco TelePresence Touch 10 control panel
- Cisco cameras and microphones
- Power adapters and power cables
- PoE-rated Ethernet cable for Touch 10
- Custom cables
The difference between a single unit and an integrator package is that the latter option doesn’t include basic mounting parts like screen, loudspeakers, and standard cables (Ethernet and HDMI).
The structure of the codec is:
- Supports up to three screens, eight microphones, and three sets of stereo loudspeakers
- Supports up to seven cameras but only if you add a video switcher
- Has four input connectors that can be used simultaneously for cameras, laptops, and other input sources.
Place the codec on a plane surface or mount it in a standard rack
- On a plane surface
You should attach the provided rubber feet on the bottom of the codec to place them on the plane surface. Make sure you attach the rubber feet in the recess in each corner.
- To mount the codec in the standard rack
You should fasten the rack ears to the codec using four screws, which are pre-mounted in the codec. Using the Allen key, you should remove the screws and put the rack ears in place, and fasten them with the same screws.
Connect to LAN, microphones, loudspeakers, Touch 10, and screens
These are the basic parts of the installation of the Cisco TelePresence SX80 codec. The codec will be functional only if it’s connected to these parts. Before you connect or disconnect the cables, make sure all units are switched off.
- For LAN, you should always use the 1st Ethernet port
- For microphones, you have a maximum 8 euro block of 3.5mm. If your microphone cable has 3 pins, use +,-, and ground. You should leave the mute pin unused.
- For loudspeakers, mono or stereo, you should use them with amplifiers. Make sure the speaker or amplifier has balanced input to avoid ground loop noise.
- For the Touch 10 control panel, you should insert the provided PoE injector between Touch 10 and the codec’s 2nd and 3rd Ethernet port2. These ports can also be used for the Cisco SpeakerTrack 60, Precision 60, and Quad cameras. If you need more than two ports to support your devices, you should connect a network switch to the codec’s 2nd or 3rd Ethernet port.
- For cameras, there are different ports for different cameras and the camera control.
Connect a PC to the codec (It’s optional)
To share content locally or with conference participants, you should connect a PC to the codec.
Connect to power and switch on the system
Your system won’t start immediately after connecting it to power and switching it ON. It takes a few minutes so you should wait while the codec starts up. Sometimes, the startup process includes automatic upgrade and restart of Touch 10 and camera (s).
To know more about the Cisco TelePresence SX80 codec, please get in touch with us via WhatsApp at +971585811786.