Cisco PLR License Devices List and Support (2026 Update)
Cisco PLR License UAE – Offline Licensing for Secure Government & Enterprise Networks
In today’s highly secure digital infrastructure environment, organizations in the UAE require complete control over their IT systems without exposing them to external connectivity risks. The Cisco PLR License UAE (Permanent License Reservation) provides a fully offline licensing model designed specifically for air-gapped and regulated networks.
Cisco Smart Licensing Using Policy supports connected and offline reporting workflows. PLR is a separate reservation option for supported platforms and releases; confirm the exact device, software version and Cisco authorization before procurement.
Learn more about Cisco PLR License UAE solution
What is Cisco PLR License (Permanent License Reservation)?
Cisco PLR is a node-locked permanent licensing model designed for environments where internet access is restricted or completely unavailable. Its availability and authorization requirements depend on the exact product and software release. Do not treat a platform-family name as confirmation of PLR support.
- Government and defense networks
- Air-gapped data centers
- Financial institutions with strict compliance
- Critical infrastructure environments
Key Benefits of Cisco PLR License in UAE
- Offline device operation after the applicable authorization process
- No direct device-to-cloud connection in supported offline deployments
- Platform-specific licence authorization
- Review NESA and ISR requirements separately
- Ideal for secure air-gapped environments
- Licensing design matched to network isolation requirements
Cisco PLR vs Smart Licensing
| Feature | Cisco PLR License | Cisco Smart Licensing |
|---|---|---|
| Internet Dependency | Offline device operation where supported | Connected or offline workflows, depending on platform and policy |
| Setup Method | Manual authorization activation | Workflow varies by licensing generation and software release |
| Best Use Case | Air-gapped and government networks | Standard enterprise environments |
| License Model | Reservation subject to the platform and authorization terms | Licence term depends on the entitlement purchased |
| Compliance | Requires a separate assessment of the complete deployment | Offline options exist; assess the exact platform and policy |
Cisco Catalyst Licence Reservation Checks
Cisco Catalyst 9000 Series
The Cisco Catalyst 9000 Series is Cisco’s flagship switching platform designed for enterprise-grade performance and security. Check the exact switch and release: Cisco documents Specific License Reservation for supported Catalyst platforms, which must not be assumed to be PLR.
View Cisco Catalyst 9000 Series
Cisco Catalyst 3000 Series
For Catalyst 3000 Series enquiries, provide the complete product ID and software release. Confirm the supported licensing method and required entitlements before ordering.
Cisco Security & Firewall Licensing Checks
Cisco Secure Firewall (Firepower)
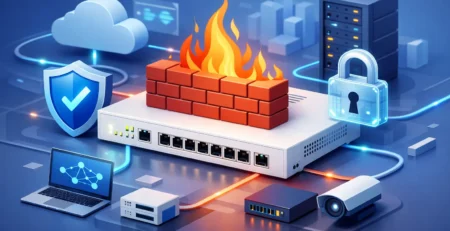
Confirm the firewall model, software release, feature subscriptions and update requirements. Offline licensing does not establish that every security service works without connectivity.
Cisco ASA Series
Enterprise-grade firewall solution supporting VPN, inspection, and secure segmentation.
Cisco Wireless Licence Reservation Checks
For Cisco Catalyst 9800 controllers, identify the physical or virtual model, software release, access-point requirements and entitlements. Verify the supported licensing workflow in the matching Cisco guide rather than assuming full PLR support.
Data Center and Routing Platforms to Verify Before Ordering
- Cisco Nexus data center switches
- Cisco MDS storage networking systems
- NX-OS and IOS XE platforms
- ISR and ASR routing platforms
Cisco Identity Services Engine (ISE) Licensing Checks
Cisco ISE licensing must be checked against the exact release, deployment size and required features. Confirm the documented offline or reservation workflow before committing to an isolated deployment.
Why Cisco PLR is Important for UAE Networks
- Assess applicable NESA requirements independently
- Confirm applicable ISR controls with the responsible organisation
- Plan the full architecture for network isolation
- Review all traffic and reporting requirements, not licensing alone
Frequently Asked Questions (FAQ)
What industries in the UAE use Cisco PLR License?
Cisco PLR is commonly used in UAE government sectors, defense organizations, banking institutions, oil & gas companies, and other critical infrastructure environments requiring strict network isolation.
Can Cisco PLR work completely without internet access?
Supported PLR deployments allow offline device operation, but the authorization process and software compatibility must be checked first. Smart Licensing Using Policy also has offline workflows; compare the options for the exact platform.
Is Cisco PLR compliant with UAE cybersecurity regulations?
A licence reservation does not by itself establish NESA or ISR compliance. The responsible organisation must assess the complete architecture, controls, approvals and evidence for its deployment.
How is Cisco PLR different from Smart Licensing?
PLR is a platform-specific reservation workflow. Smart Licensing Using Policy can use direct, mediated or offline communication; the supported method and reporting obligations depend on the product, release and policy.
Buy Cisco PLR License in UAE
For organizations looking to deploy secure and fully offline Cisco licensing solutions in the UAE, Gear Net Technologies LLC provides professional consultation and support.
You can reach the team through +971 4 601 2000 or connect instantly via WhatsApp at +971 58 581 1786. For email inquiries, contact sales@gntme.com. More details and consultation requests can also be submitted via the official contact page.
Visit Gear Net Technologies |
Contact Page
Cisco PLR, SLR and Smart Licensing: Practical Differences
| Method | Typical purpose | Connectivity and control | Important check |
|---|---|---|---|
| Smart Licensing Using Policy | Current Cisco licensing workflow for many connected enterprise platforms | Usage reporting and account workflows vary by product and software release | Confirm the Smart Account, Virtual Account, policy and reporting requirements |
| Specific License Reservation (SLR) | Reservation for an identified device in a restricted environment | Reservation and authorization are handled for a specific UDI | Confirm that the exact platform and software release support SLR |
| Permanent License Reservation (PLR) | Special reservation workflow for eligible highly restricted networks | Availability is controlled by Cisco and is not universal across products or customers | Obtain Cisco approval and use an authorized entitlement for the exact device |
Important: PLR does not mean that every feature on every Cisco device can be unlocked permanently. Eligibility, terminology and activation steps differ by platform and release. A reservation code or licence obtained for another device must not be reused, and licensing should never be bypassed.
PLR Compatibility Checklist
- Record the complete product ID, serial number and Unique Device Identifier (UDI).
- Confirm the operating system and exact release, such as IOS XE, NX-OS, ASA or Secure Firewall software.
- Identify the required feature tier and each entitlement needed on the device.
- Verify PLR or SLR support in the Cisco documentation for that exact platform and release.
- Confirm the owning Cisco Smart Account and Virtual Account and the customer’s eligibility.
- Follow Cisco’s documented request and authorization process; do not rely on a generic key.
- Keep the authorization record and plan the return or transfer process before hardware replacement.
How to Validate a Cisco Licence Reservation
Before deployment, use the platform’s supported licence-status commands or management interface to confirm the device UDI, reservation state, authorization status and installed entitlements. Compare the device output with the records in the relevant Cisco account. Command names vary by platform and software version, so use the official Cisco configuration guide for the exact release.
After activation, save the device configuration and licence records securely. Test required features during an approved maintenance window, and document the procedure for returning or reissuing the reservation if the hardware changes.
Air-Gapped and Regulated Networks
PLR or SLR may be relevant where operational policy restricts direct internet access, including selected government, defence, industrial and critical-infrastructure environments. A licensing method does not by itself establish compliance with NESA, ISR or any other framework. Compliance depends on the complete architecture, controls, approvals and evidence and should be assessed by the responsible authority.
See the Cisco PLR licence instructions and browse Cisco licences. Share the exact platform, PID, software release and required features when requesting compatibility guidance.

I am an enthusiastic tech blogger with 15 years of experience in the technology field. I am passionate about sharing valuable insights and helping people who are interested in technology gain useful and practical information. I am originally from Mumbai, India.